Frappe_Doc
ERPNext
ERPNext is a full-featured business management solution that helps SMEs to record all their business transactions in a single system. With ERPNext, SMEs can make informed, fact-based, timely decisions to remain ahead in the competition. It serves as the backbone of a business adding strength, transparency, and control to your growing enterprise.
Frappe Framework
Frappe was built to power our flagship product ERPNext. The core philosophy at Frappe is write as less code as possible. We prefer configuration over code. If a feature is generic and we need it, we put it right into the framework.
This has enabled us to build and maintain a complex application like an ERP which has thousands of features with a small team of developers.
Installisation Guide
Architecture
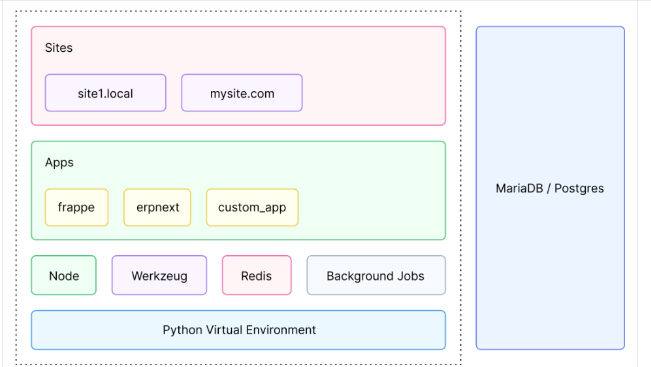
Frappe Framework is a full-stack web based framework and it includes all the tools needed to deploy a site into production. Database, caching, background jobs, realtime notifications, etc are all configured when you set up a Frappe site.
Frappe framework is based on Python, so it uses the virtualenv to setup isolated environments for multiple Python versions. You can also use it to deploy sites with different Frappe versions.
The following diagram closely resembles the frappe-bench directory structure and its interface with different parts of the stack.
Directory structure
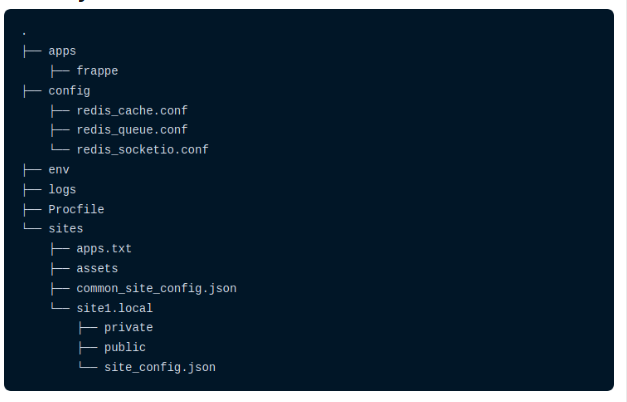
Apps
The frappe app and other frappe based apps live in this directory. When you run the command bench new-app app_name, the app will be bootstrapped in this directory. Your custom apps live here and you are supposed to edit/work with them here.
Creating an App
Frappe ships with a boilerplate for a new app. To create a new app, run the following command from the frappe-bench directory.

The custom_app directory will now be created in the apps directory. It will also be added to apps.txt.
Sites
Sites are served from this directory. When you run the command bench new-site site_name, the site will be created in this directory. Sites are distinguished based on their directory name.
Creating a new site
To create a new site, run the following command from the frappe-bench directory:
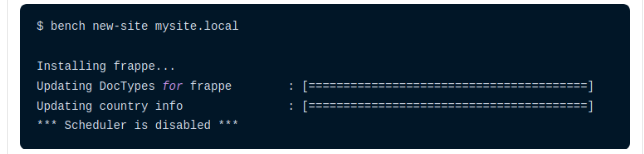
The mysite.local directory will now be created in the sites directory.
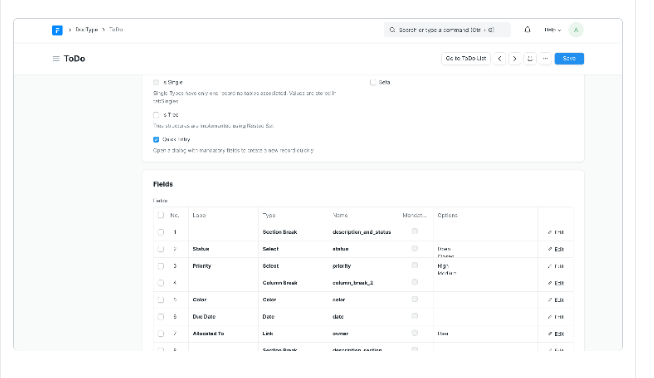
DocTypes
A DocType is the core building block of any application based on the Frappe Framework. It describes the Model and the View of your data. It contains what fields are stored for your data, and how they behave with respect to each other. It contains information about how your data is named. It also enables rich Object Relational Mapper (ORM) pattern which we will discuss later in this guide. When you create a DocType, a JSON object is created which in turn creates a database table.
Workflows
With workflows you can rewrite how a particular process/workflow is approved in ERPNext.
You can set multiple levels of approval for an ERPNext Workflow. To allow multiple people to submit multiple requests, for approvals by multiple users, ERPNext requires you to fill the Workflow conditions. ERPNext tracks the multiple permissions before submission.
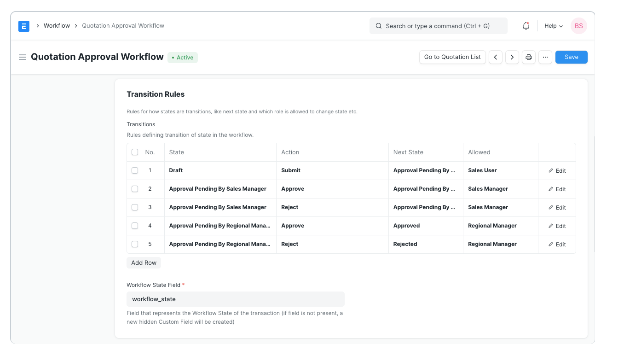
Consider a scenario, where multiple levels of approval are required for a quotation. A sales person (user with 'Sales User' role) will create a quotation. Then it is either approved or rejected by a sales lead (user with 'Sales Manager' role). If approved by sales lead, it is further approved or rejected by regional manager (user with 'Regional Manager' role).
To make a Workflow and transition rules go to:
Home > Settings > Workflow
Once a Workflow is created, you can take actions on it via Workflow Actions.
Prerequisites
Before creating a Workflow, it is advised to create these first:
Workflow Actions
Workflow States like Approved, Canceled, etc.
How to Create a Workflow
Go to the Workflow list, click on New.
Enter a name for the Workflow and select the DocType on which to be applied.
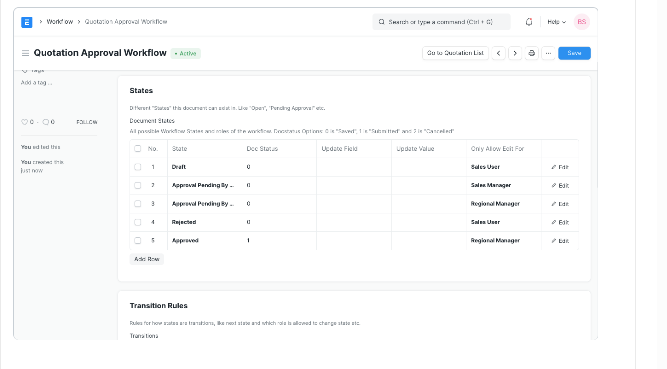
Enter the different states of the Workflow. Enter Doc Status for them, select which field to update from the Update Field column, enter what the value will be updated to under Update Value.
The Workflow States can have different colors according to the state. Eg: Green for success. Document statuses: Saved = 0, Submitted = 1, Cancelled = 2.
Enter the Transition Rules.
Add a comment...