Frappe Documentation
Introduction
Welcome to Frappe Framework Documentation
Frappe, pronounced fra-pay, is a full stack, batteries-included, web framework written in Python and Javascript with MariaDB as the database. It is the framework which powers ERPNext, is pretty generic and can be used to build database driven apps.
The key difference in Frappe compared to other frameworks is that meta-data is also treated as data. This enables you to build front-ends very easily.Frappe comes with almost everything you need to build a modern web application. It has a full featured Admin UI called the Desk that handles forms, navigation, lists, menus, permissions, file attachment and much more out of the box.
Prerequisites
A list of resources to help you get started with building apps using Frappe.
Python
MariaDB / Postgres
HTML / CSS
JavaScript / jQuery
Jinja Templating
Git / GitHub
Architecture
Frappe Framework is a full-stack web based framework and it includes all the tools needed to deploy a site into production. Database, caching, background jobs, realtime notifications, etc are all configured when you set up a Frappe site.
The following diagram closely resembles the frappe-bench directory structure and its interface with different parts of the stack.

ERPNext
ERPNext is a free and open-source integrated Enterprise Resource Planning (ERP) software developed by Frappe Technologies Pvt. Ltd. and is built on MariaDB database system using Frappe, a Python based server-side framework.
ERPNext is a generic ERP software used by manufacturers, distributors and services companies. It includes modules like accounting, CRM, sales, purchasing, website, e-commerce, point of sale, manufacturing, warehouse, project management, inventory, and services. Also, it has domain specific modules like schools, healthcare, agriculture, and non-profit.
ERPNext contains these modules:
1.Accounting
2.Asset management
3.Customer relationship management (CRM)
4.Human resource management (HRM)
5.Payroll
6.Project management
7.Purchasing
8.Sales management
9.Warehouse management system
10. Website
Desk
Frappe Framework comes with a rich admin interface called the Desk. It reads meta-data from DocTypes and automatically builds list views, form views, report views, etc for your DocTypes. Desk is to be used by users of the type "System User".
Apps
A Frappe app is a python package that uses the Frappe framework. Frappe apps live in a directory called apps in the frappe-bench directory.
The default app frappe is a frappe app which acts as the framework for all apps. A Frappe app should have an entry in apps.txt
Create app
To create a new app, run the following command from the frappe-bench directory.
$ bench new-app custom_app
INFO:bench.app:creating new app custom_app
App Title (default: Custom App):
App Description: Custom Frappe App
App Publisher: John Doe
App Email: custom@johndoe.com
App Icon (default 'octicon octicon-file-directory'):
App Color (default 'grey'):
App License (default 'MIT'):
'custom_app' created at /Users/johndoe/frappe-bench/apps             /custom_app
INFO:bench.app:installing custom_app
INFO:bench.utils:./env/bin/pip install -q  -e ./apps/custom_app
The custom_app directory will now be created in the apps directory. It will also be added to apps.txt.
Directory structure
The directory structure of the app will look something like this:
apps/custom_app
├── MANIFEST.in
├── README.md
├── custom_app
│ ├── init.py
│ ├── config
│ │ ├── init.py
│ │ ├── desktop.py
│ │ └── docs.py
│ ├── custom_app
│ │ └── init.py
│ ├── hooks.py
│ ├── modules.txt
│ ├── patches.txt
│ ├── public
│ │ ├── css
│ │ └── js
│ ├── templates
│ │ ├── init.py
│ │ └── includes
│ └── www
├── custom_app.egg-info
│ ├── PKG-INFO
│ ├── SOURCES.txt
│ ├── dependency_links.txt
│ ├── not-zip-safe
│ ├── requires.txt
│ └── top_level.txt
├── license.txt
├── requirements.txt
├── dev-requirements.txt
├── package.json
└── setup.py
Sites
Frappe is a multitenant platform and each tenant is called a site. A site has its own database. Sites exist in a directory called sites, assumed as the current working directory when running a bench command.
Create a new site
To create a new site, run the following command from the frappe-bench directory:
   $ bench new-site mysite.local

        Installing frappe...
        Updating DocTypes for frappe        : [========================================]
        Updating country info               : [========================================]
        *** Scheduler is disabled ***
This command will create a new database, so you need to enter
your MySQL root password
Access site in your browser
Now, that we have created our first site, we can access it on http://localhost:8000 in our browser.
However, bench allows you to create multiple sites and access
them separately in the browser on the same port. This is what we call multi-tenancy support in bench.
$ rm sites/currentsite.txt
127.0.0.1 library.test
$ bench --site library.test add-to-hosts
Set a site as the current site
To force a site to be used as the default site, run the following command:
$ bench use library.test
Installing an app into a site
To use an app, it must be installed on a site. Installing an app on a site means creating the models that are bundled with the app into the site, which means creating database tables in the site database.
To install an app into a site, run the following command:
$ bench --site site_name install-app custom_app

Installing custom_app...
Doctype
A DocType is the core building block of any application based on the Frappe Framework. It describes the Model and the View of your data. It contains what fields are stored for your data, and how they behave with respect to each other. It contains information about how your data is named. It also enables rich Object Relational Mapper (ORM) pattern which we will discuss later in this guide. When you create a DocType, a JSON object is created which in turn creates a database table.
ORM is just an easy way to read, write and update data in a database without writing explicit SQL statements__
The standard way to create a DocType is by typing new doctype in the search bar in the Desk.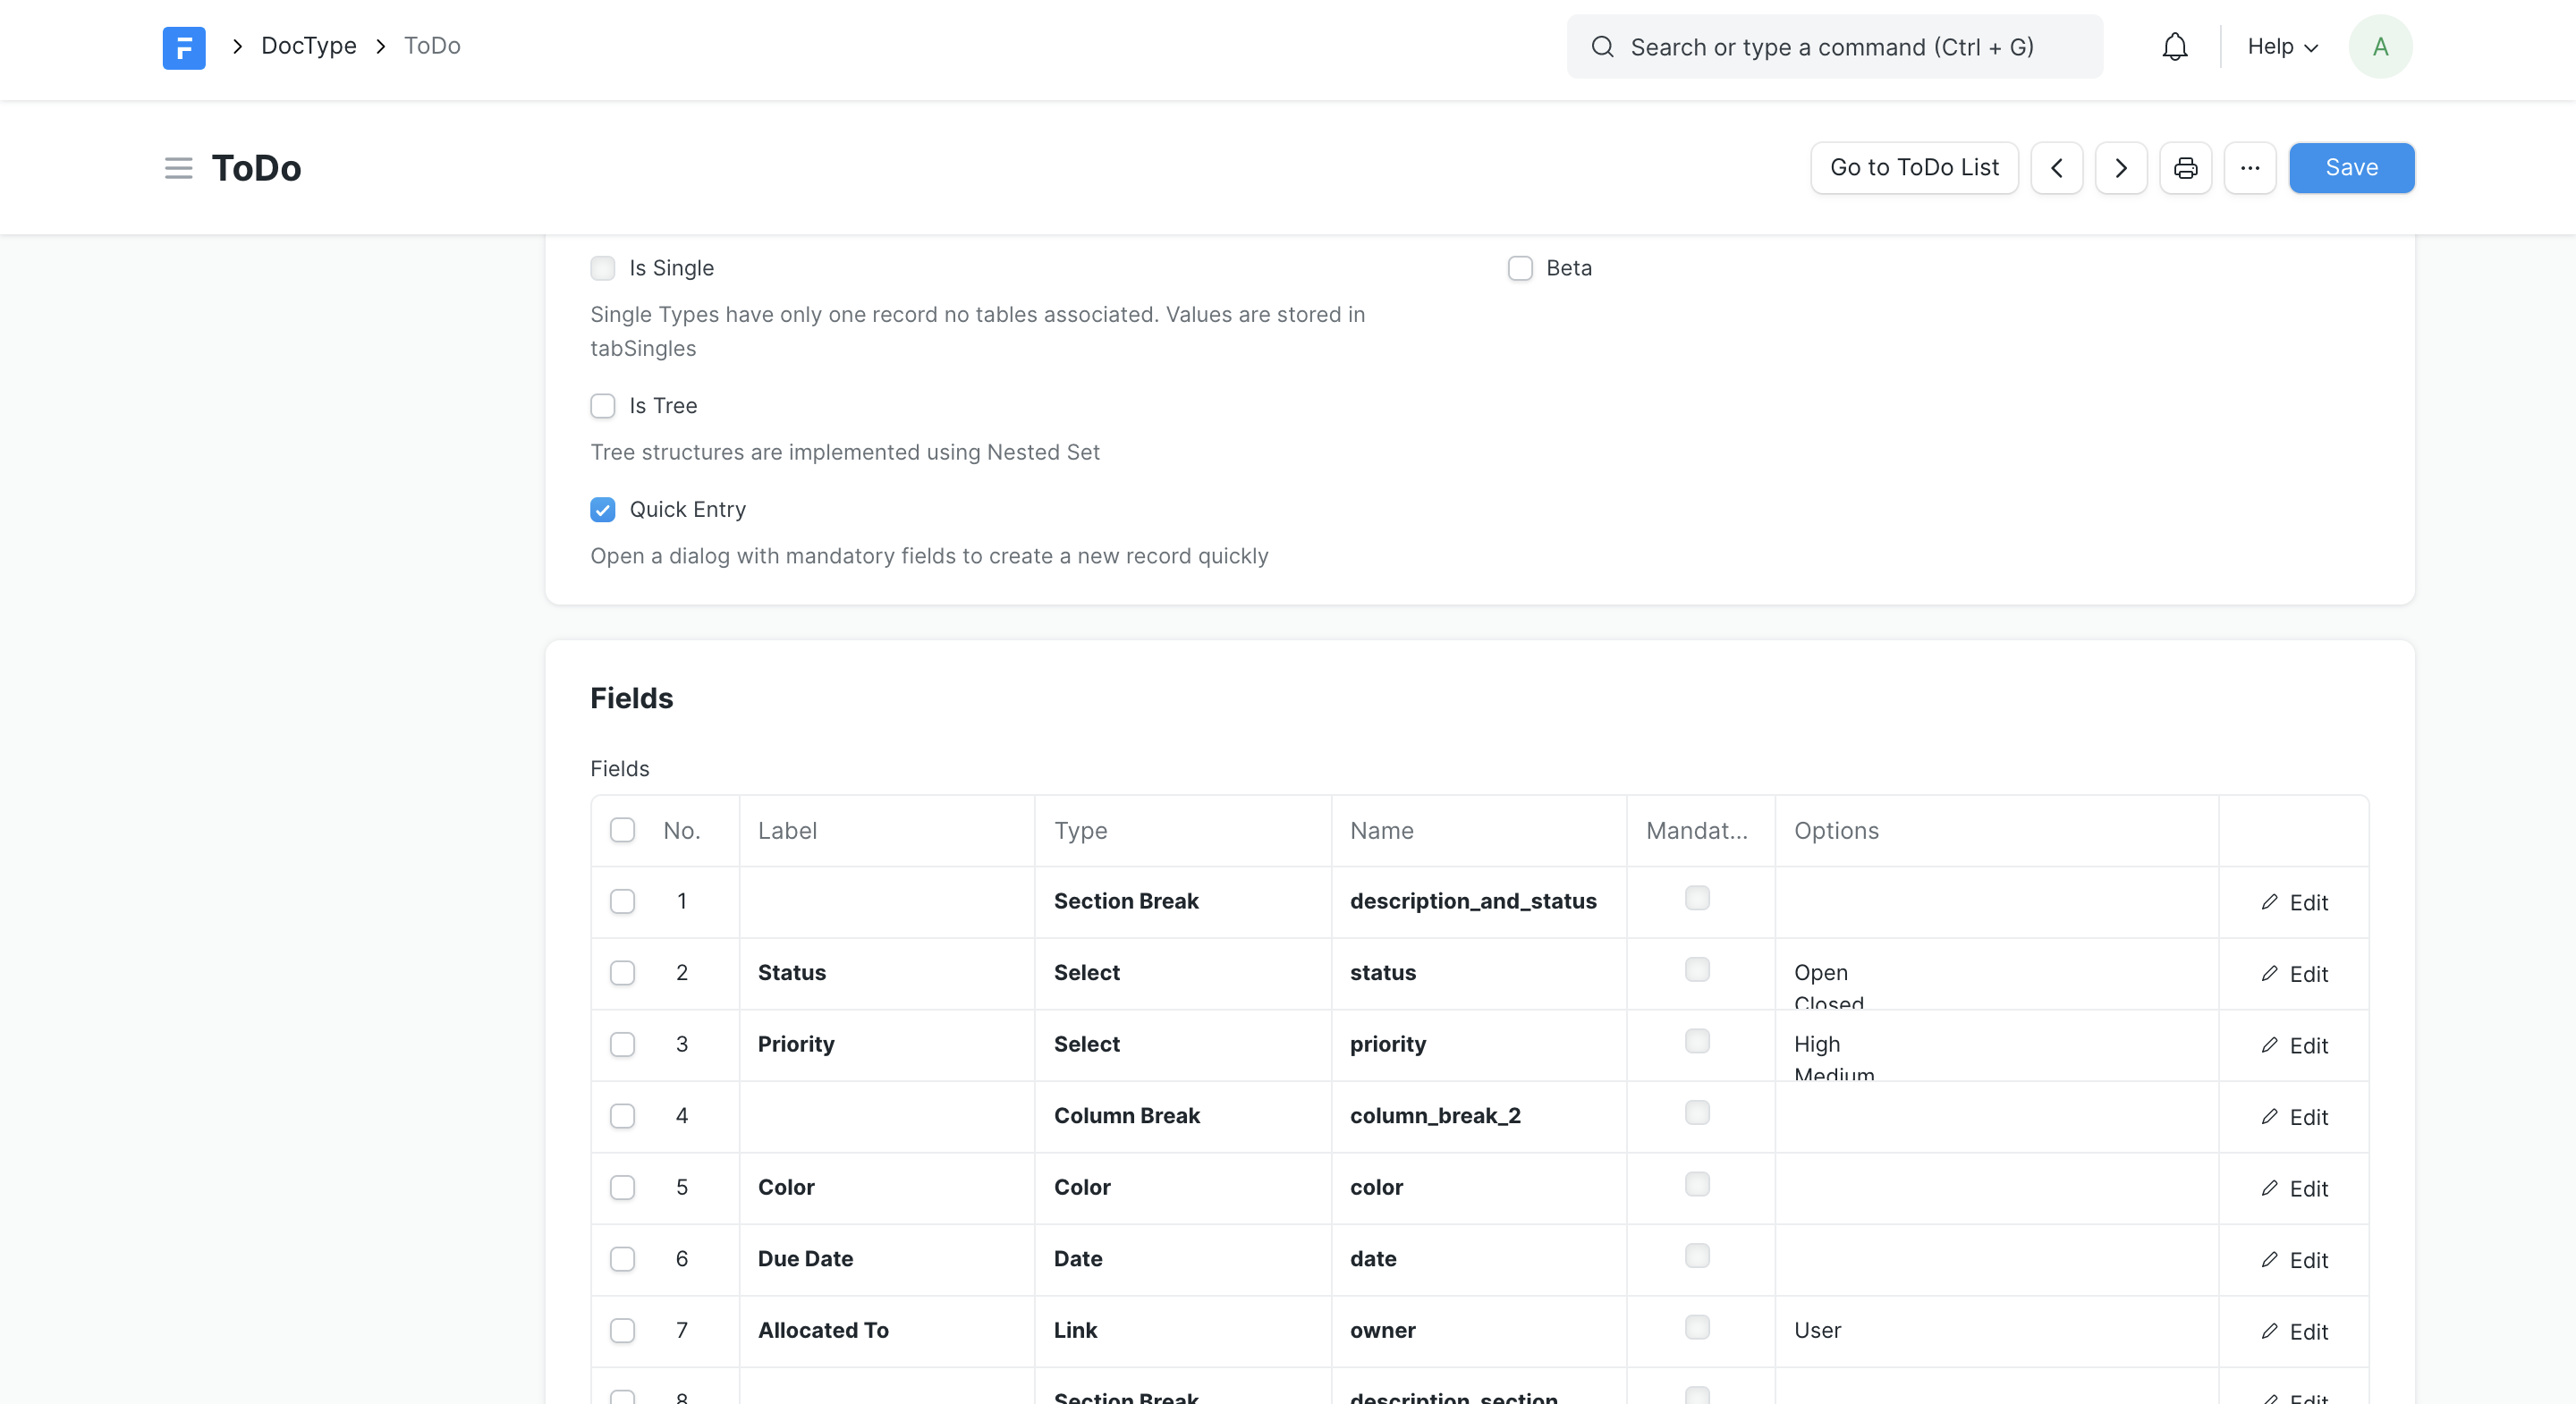
A DocType not only stores fields, but also other information about how your data behaves in the system. We call this Meta. Since this meta-data is also stored in a database table, it makes it easy to change meta-data on the fly without writing much code.
After creating a DocType, Frappe can provide many features out-of-the-box. If you go to /app/todo you will be routed to the List View in the desk.
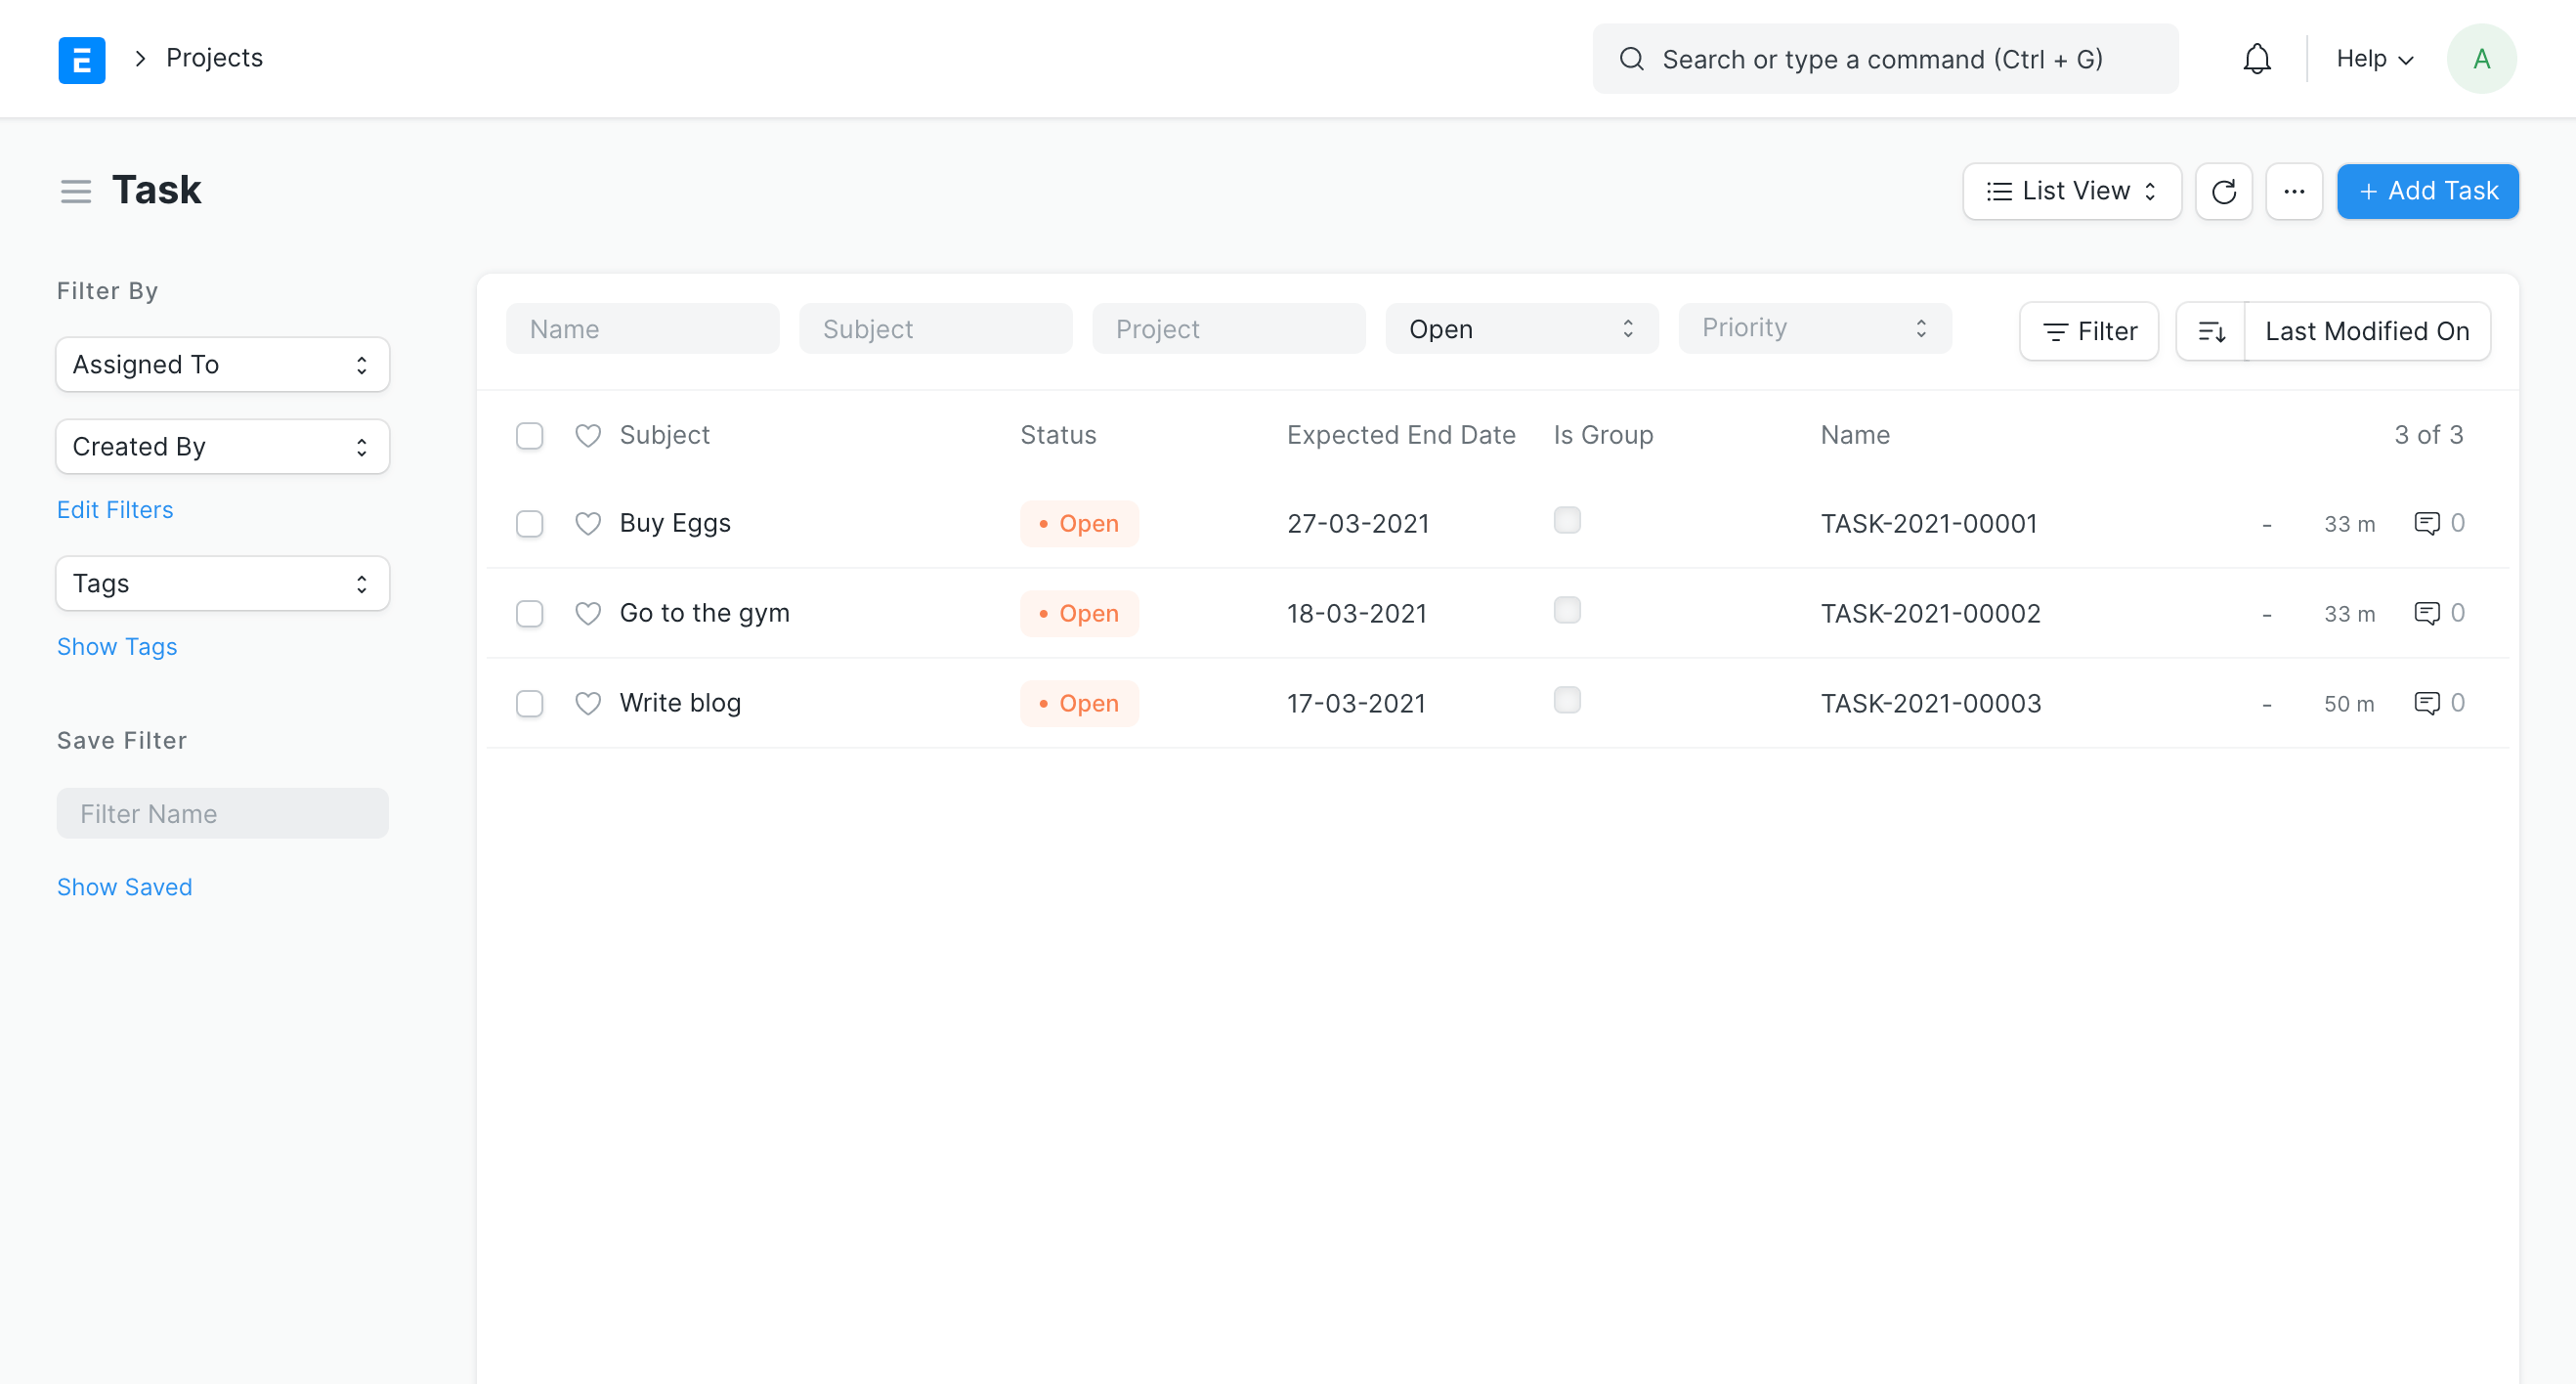 Similarly, you get a Form View at the route /app/todo/000001. The Form is used to create new docs and view them.
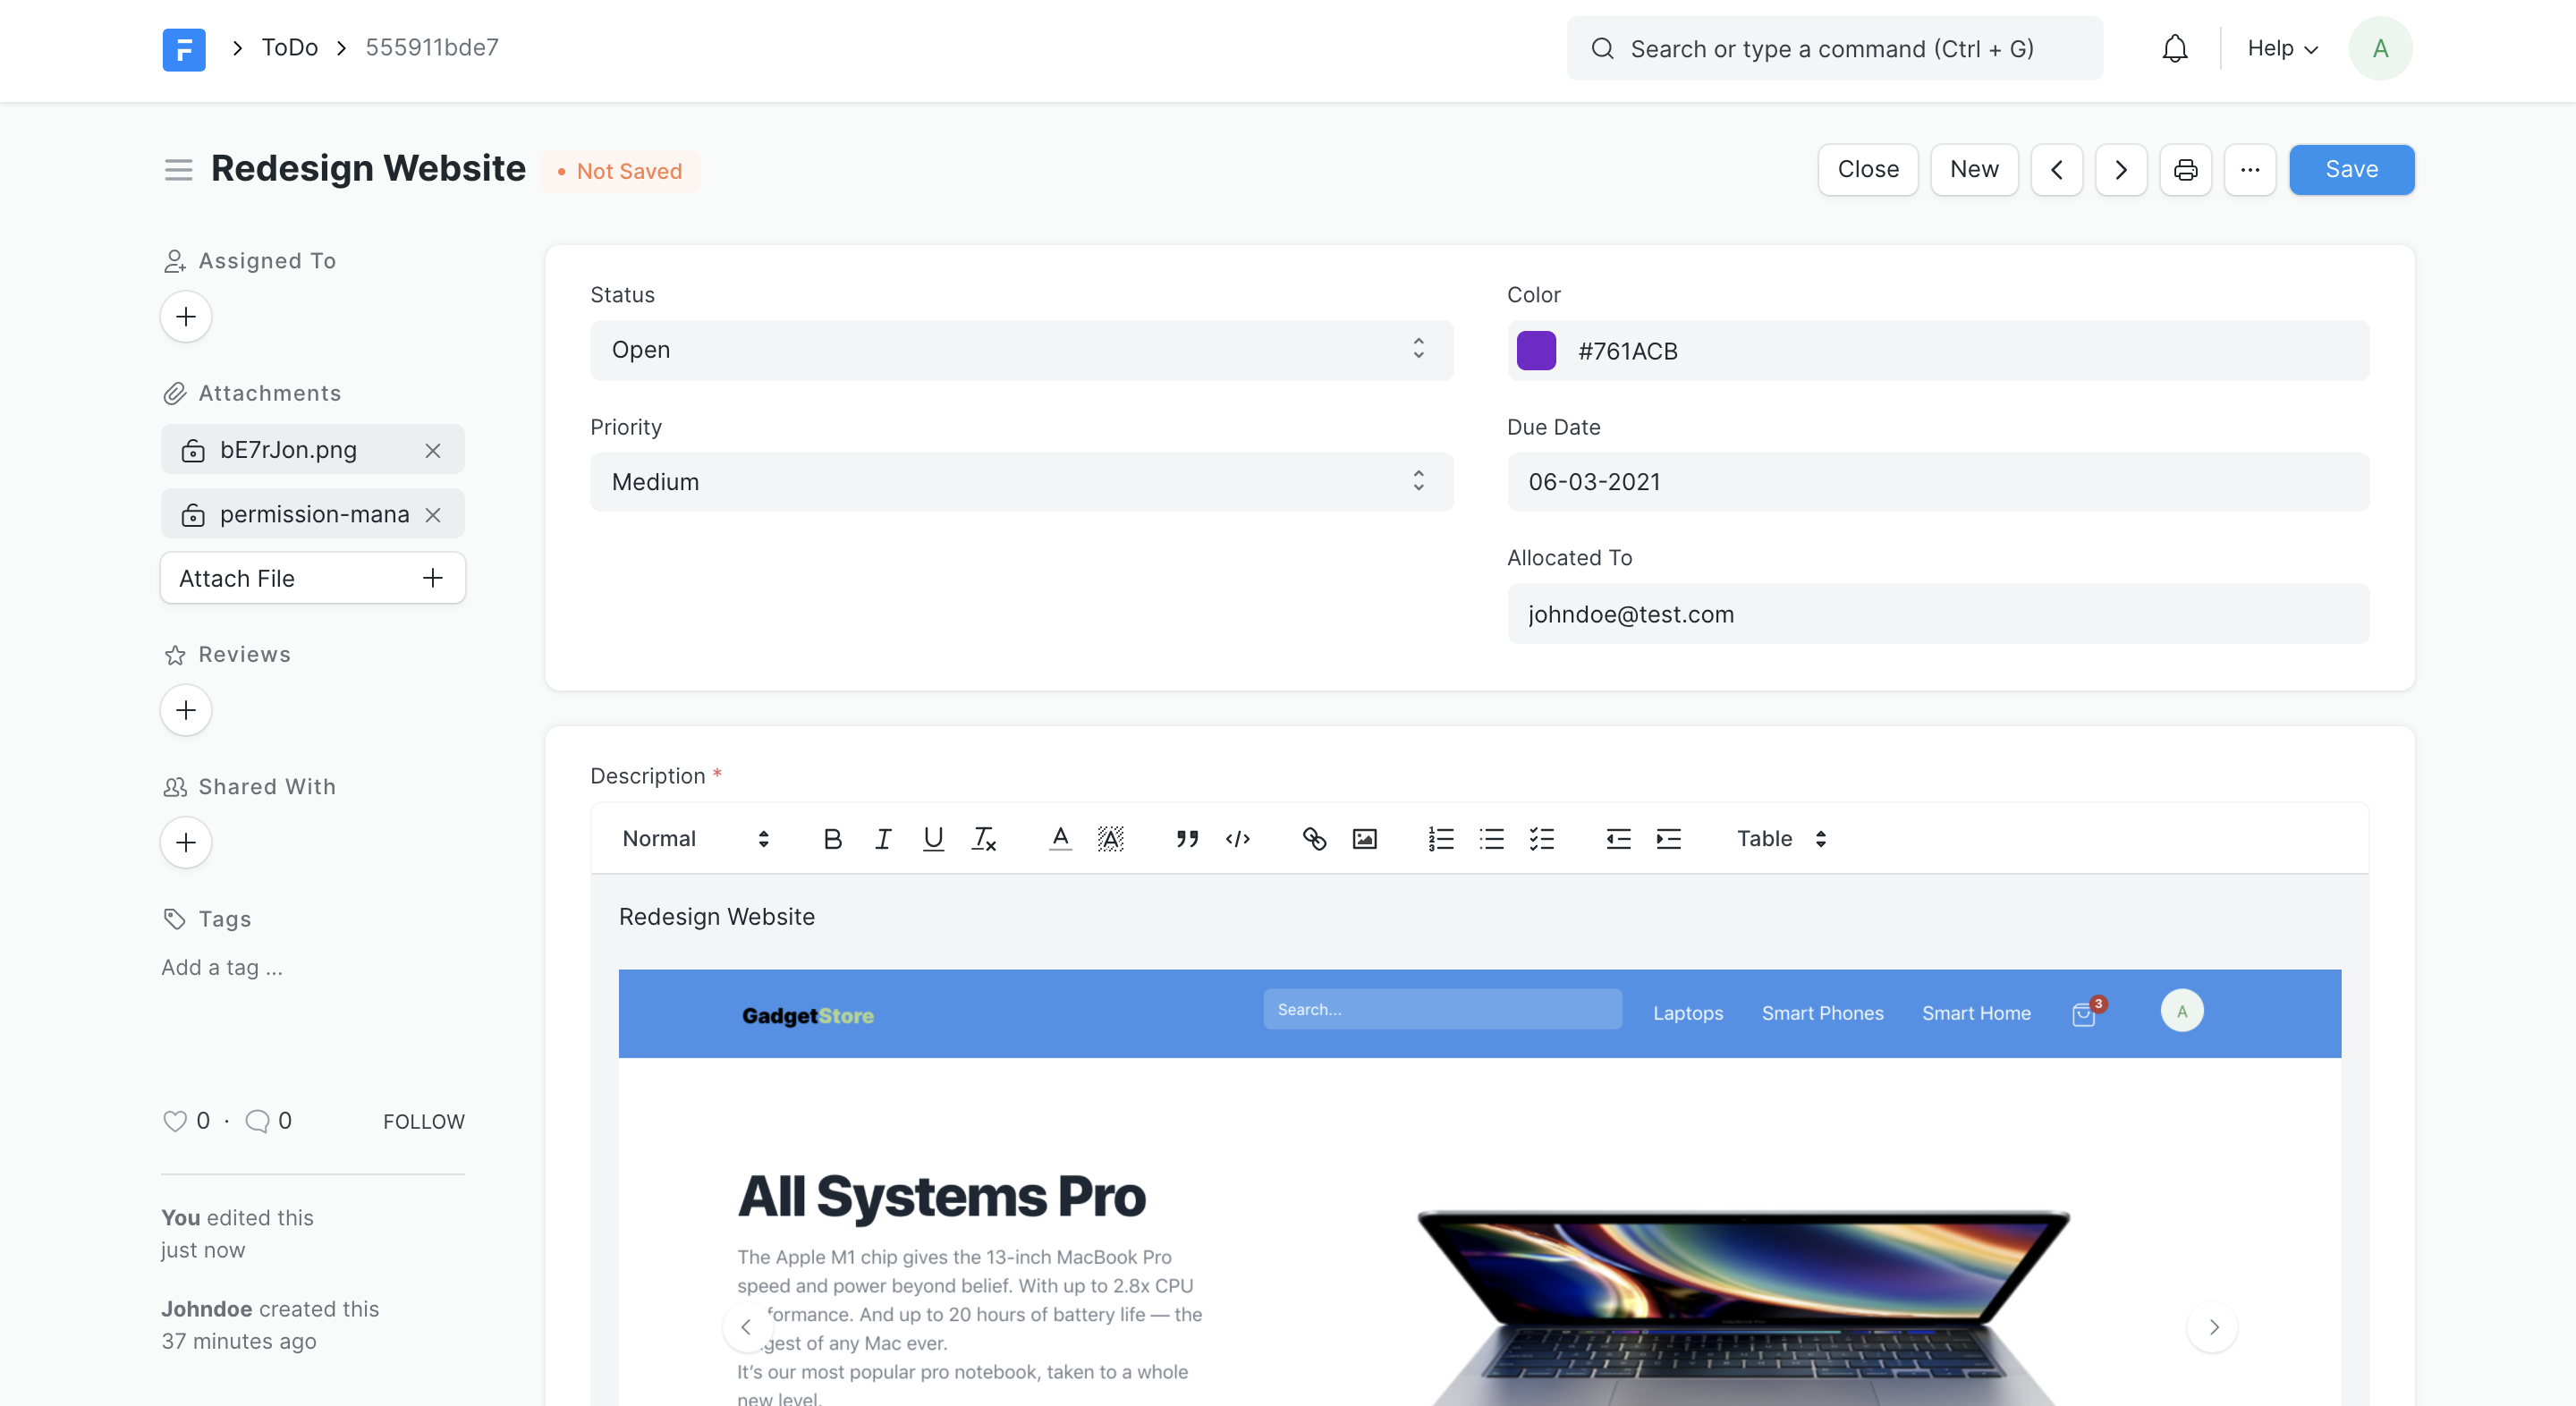
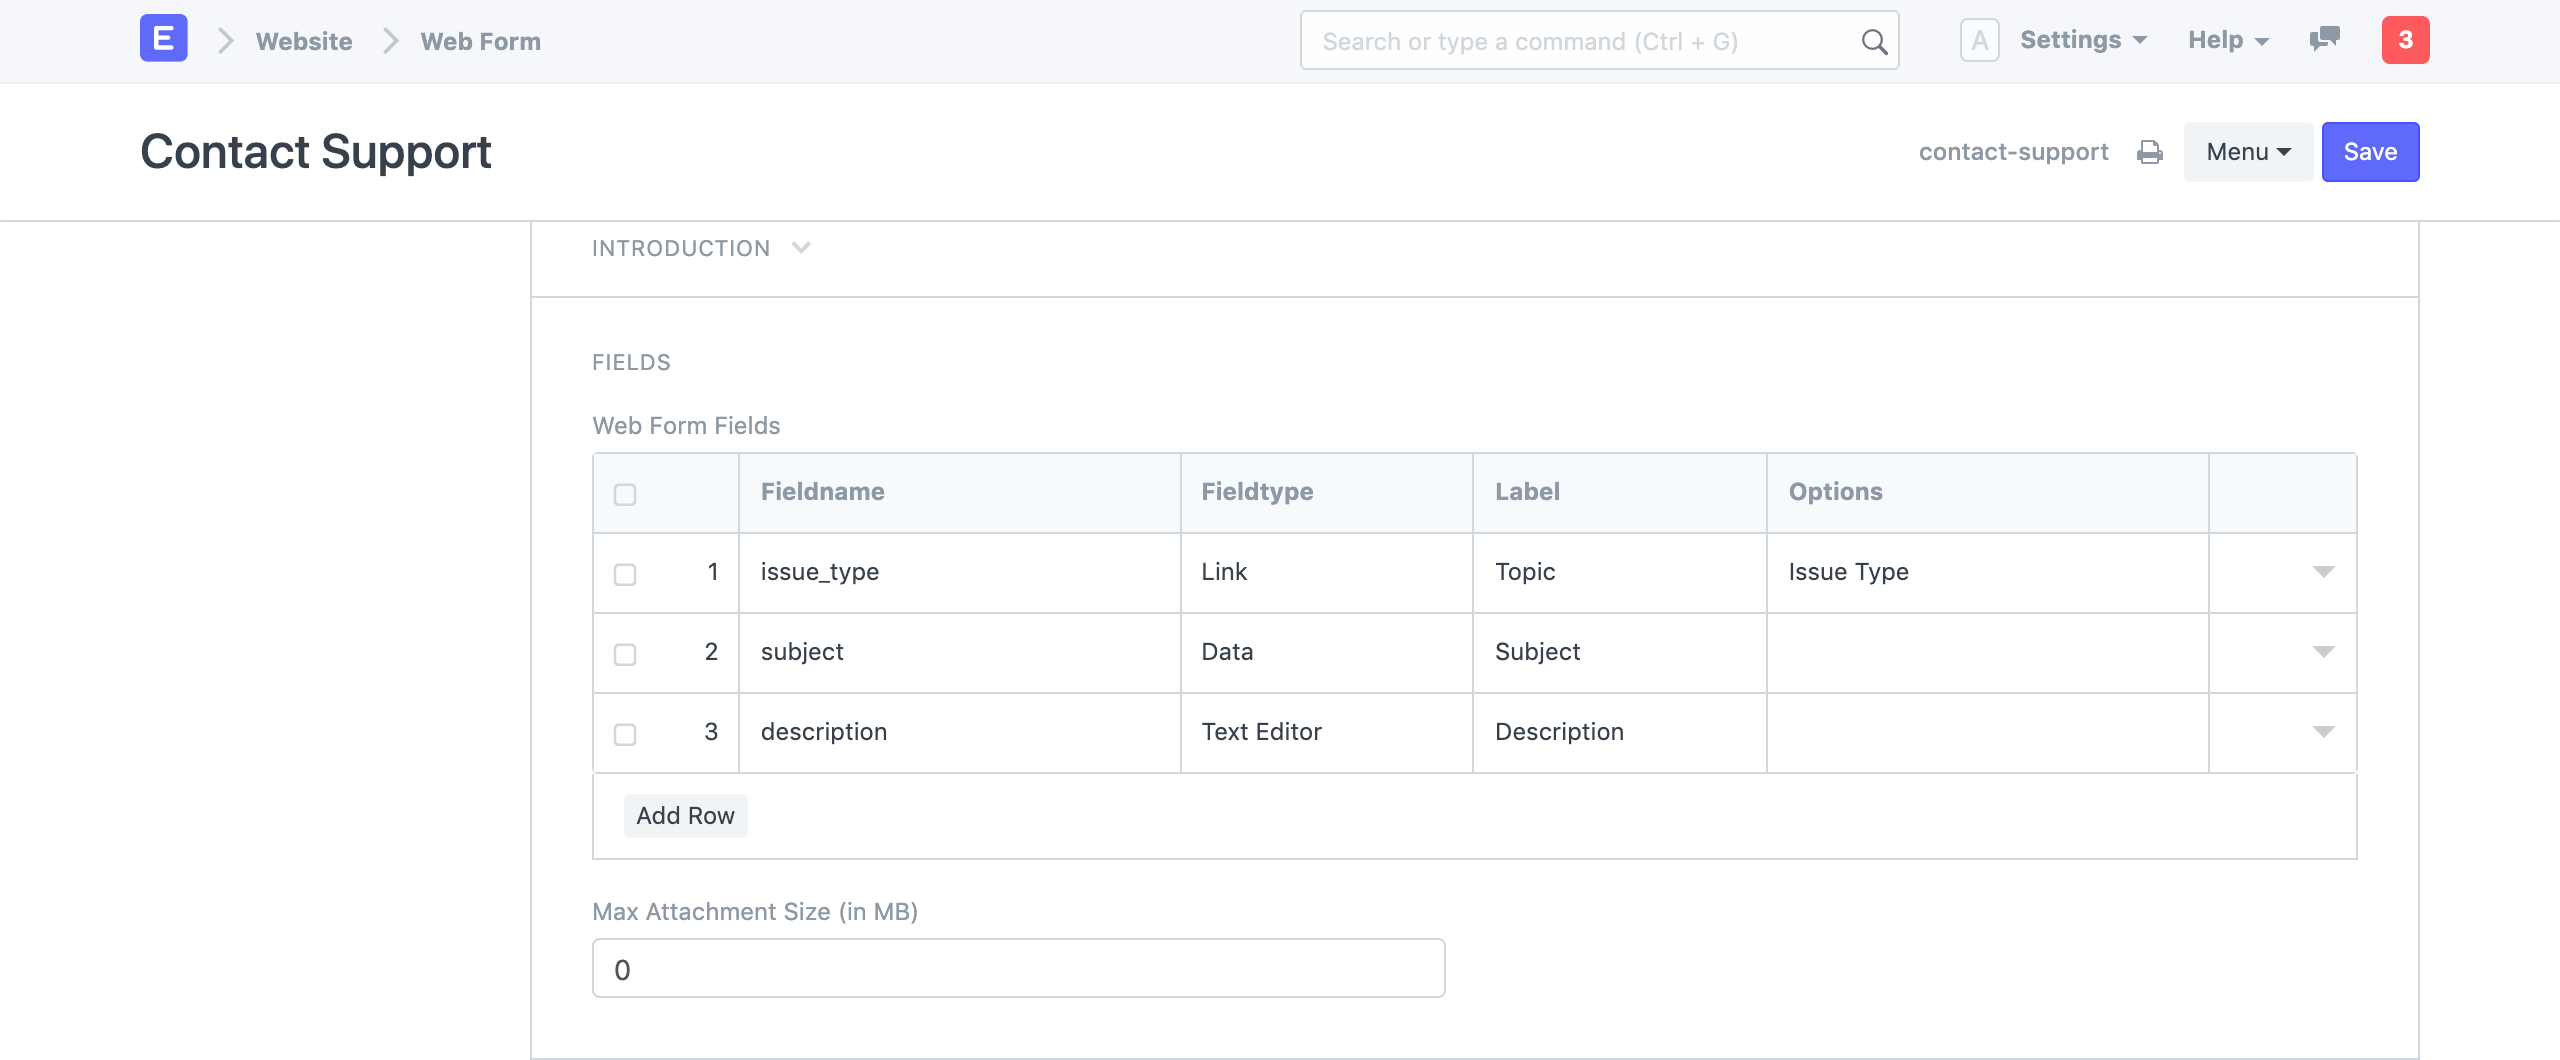
Creating a Web Form
To create a Web Form, type "new web form" in awesomebar and hit enter.
To create a new Web Form go to:
Home > Website > Web Site > Web Form
1.Enter Title
2.Select DocType for which the record should be created.
3.Select fields for your web form. These fields are populated from the DocType.
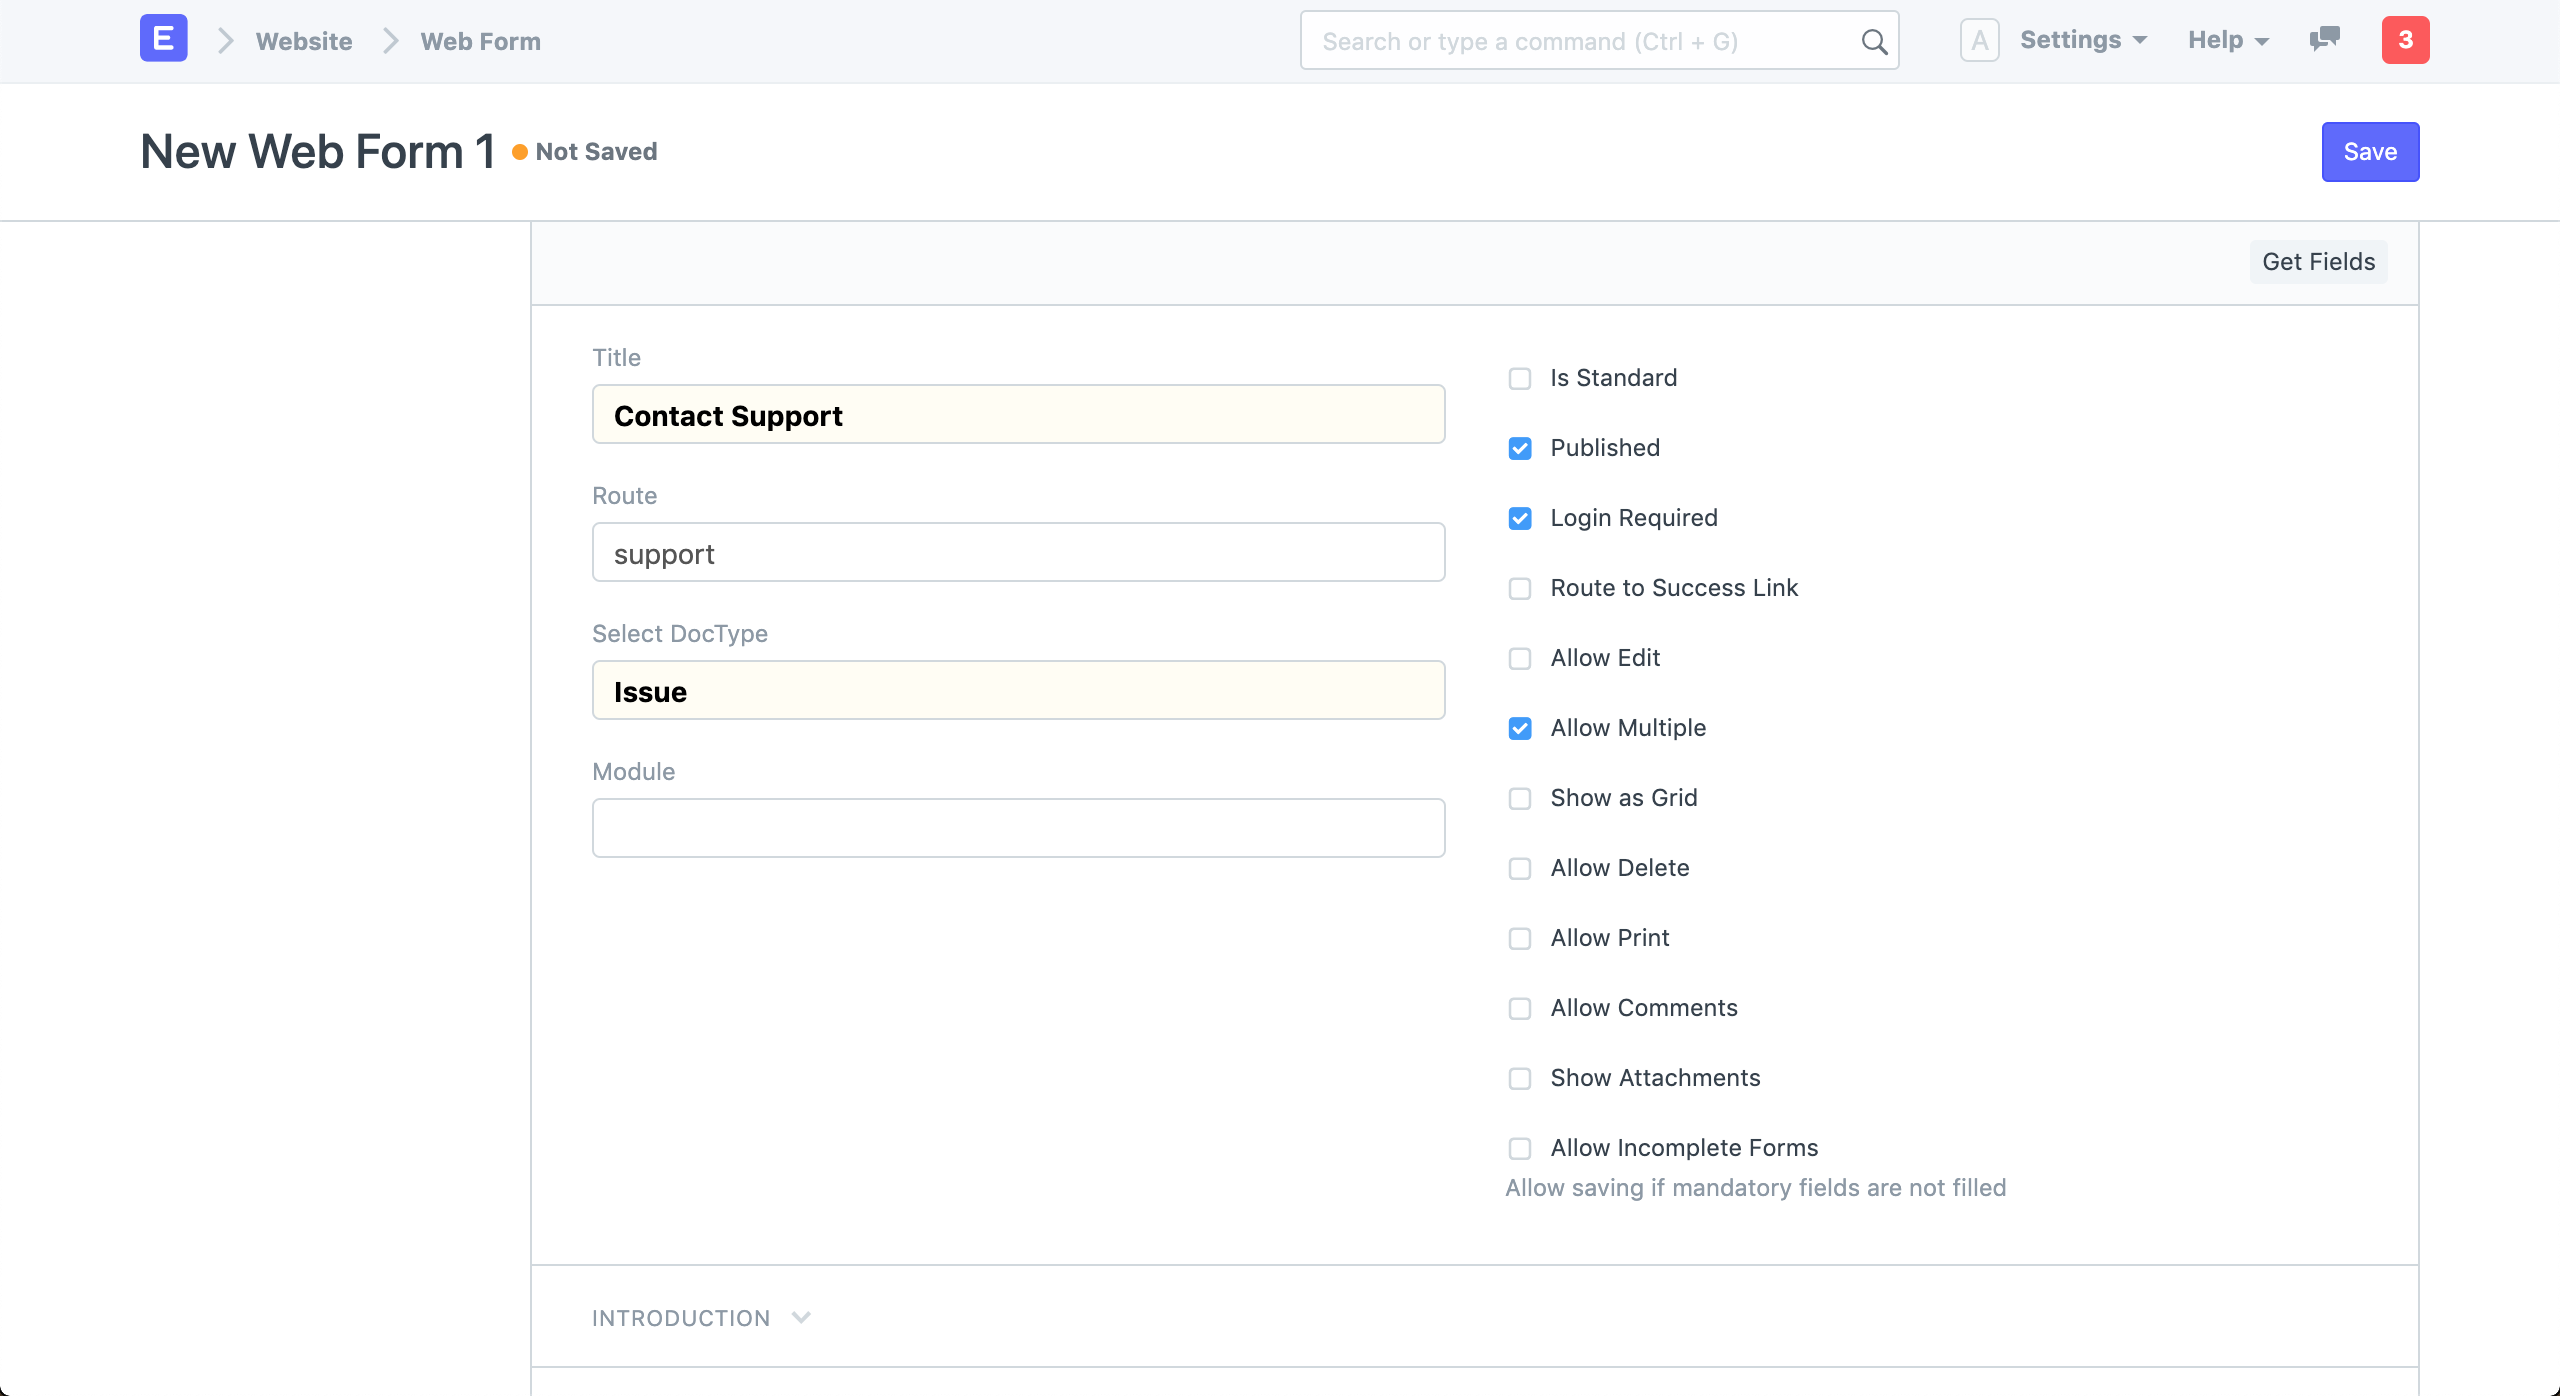
Select the DocType based on which you want to build your Web Form. The Route will be set based on the Title of your Web Form. You can also add an Introduction text to show a friendly message above your form.
Add fields to your Web Form. These are the fields from the DocType you have selected. You can change the Label for these fields. Try to keep number of fields to be minimum as long forms are cumbersome to fill.
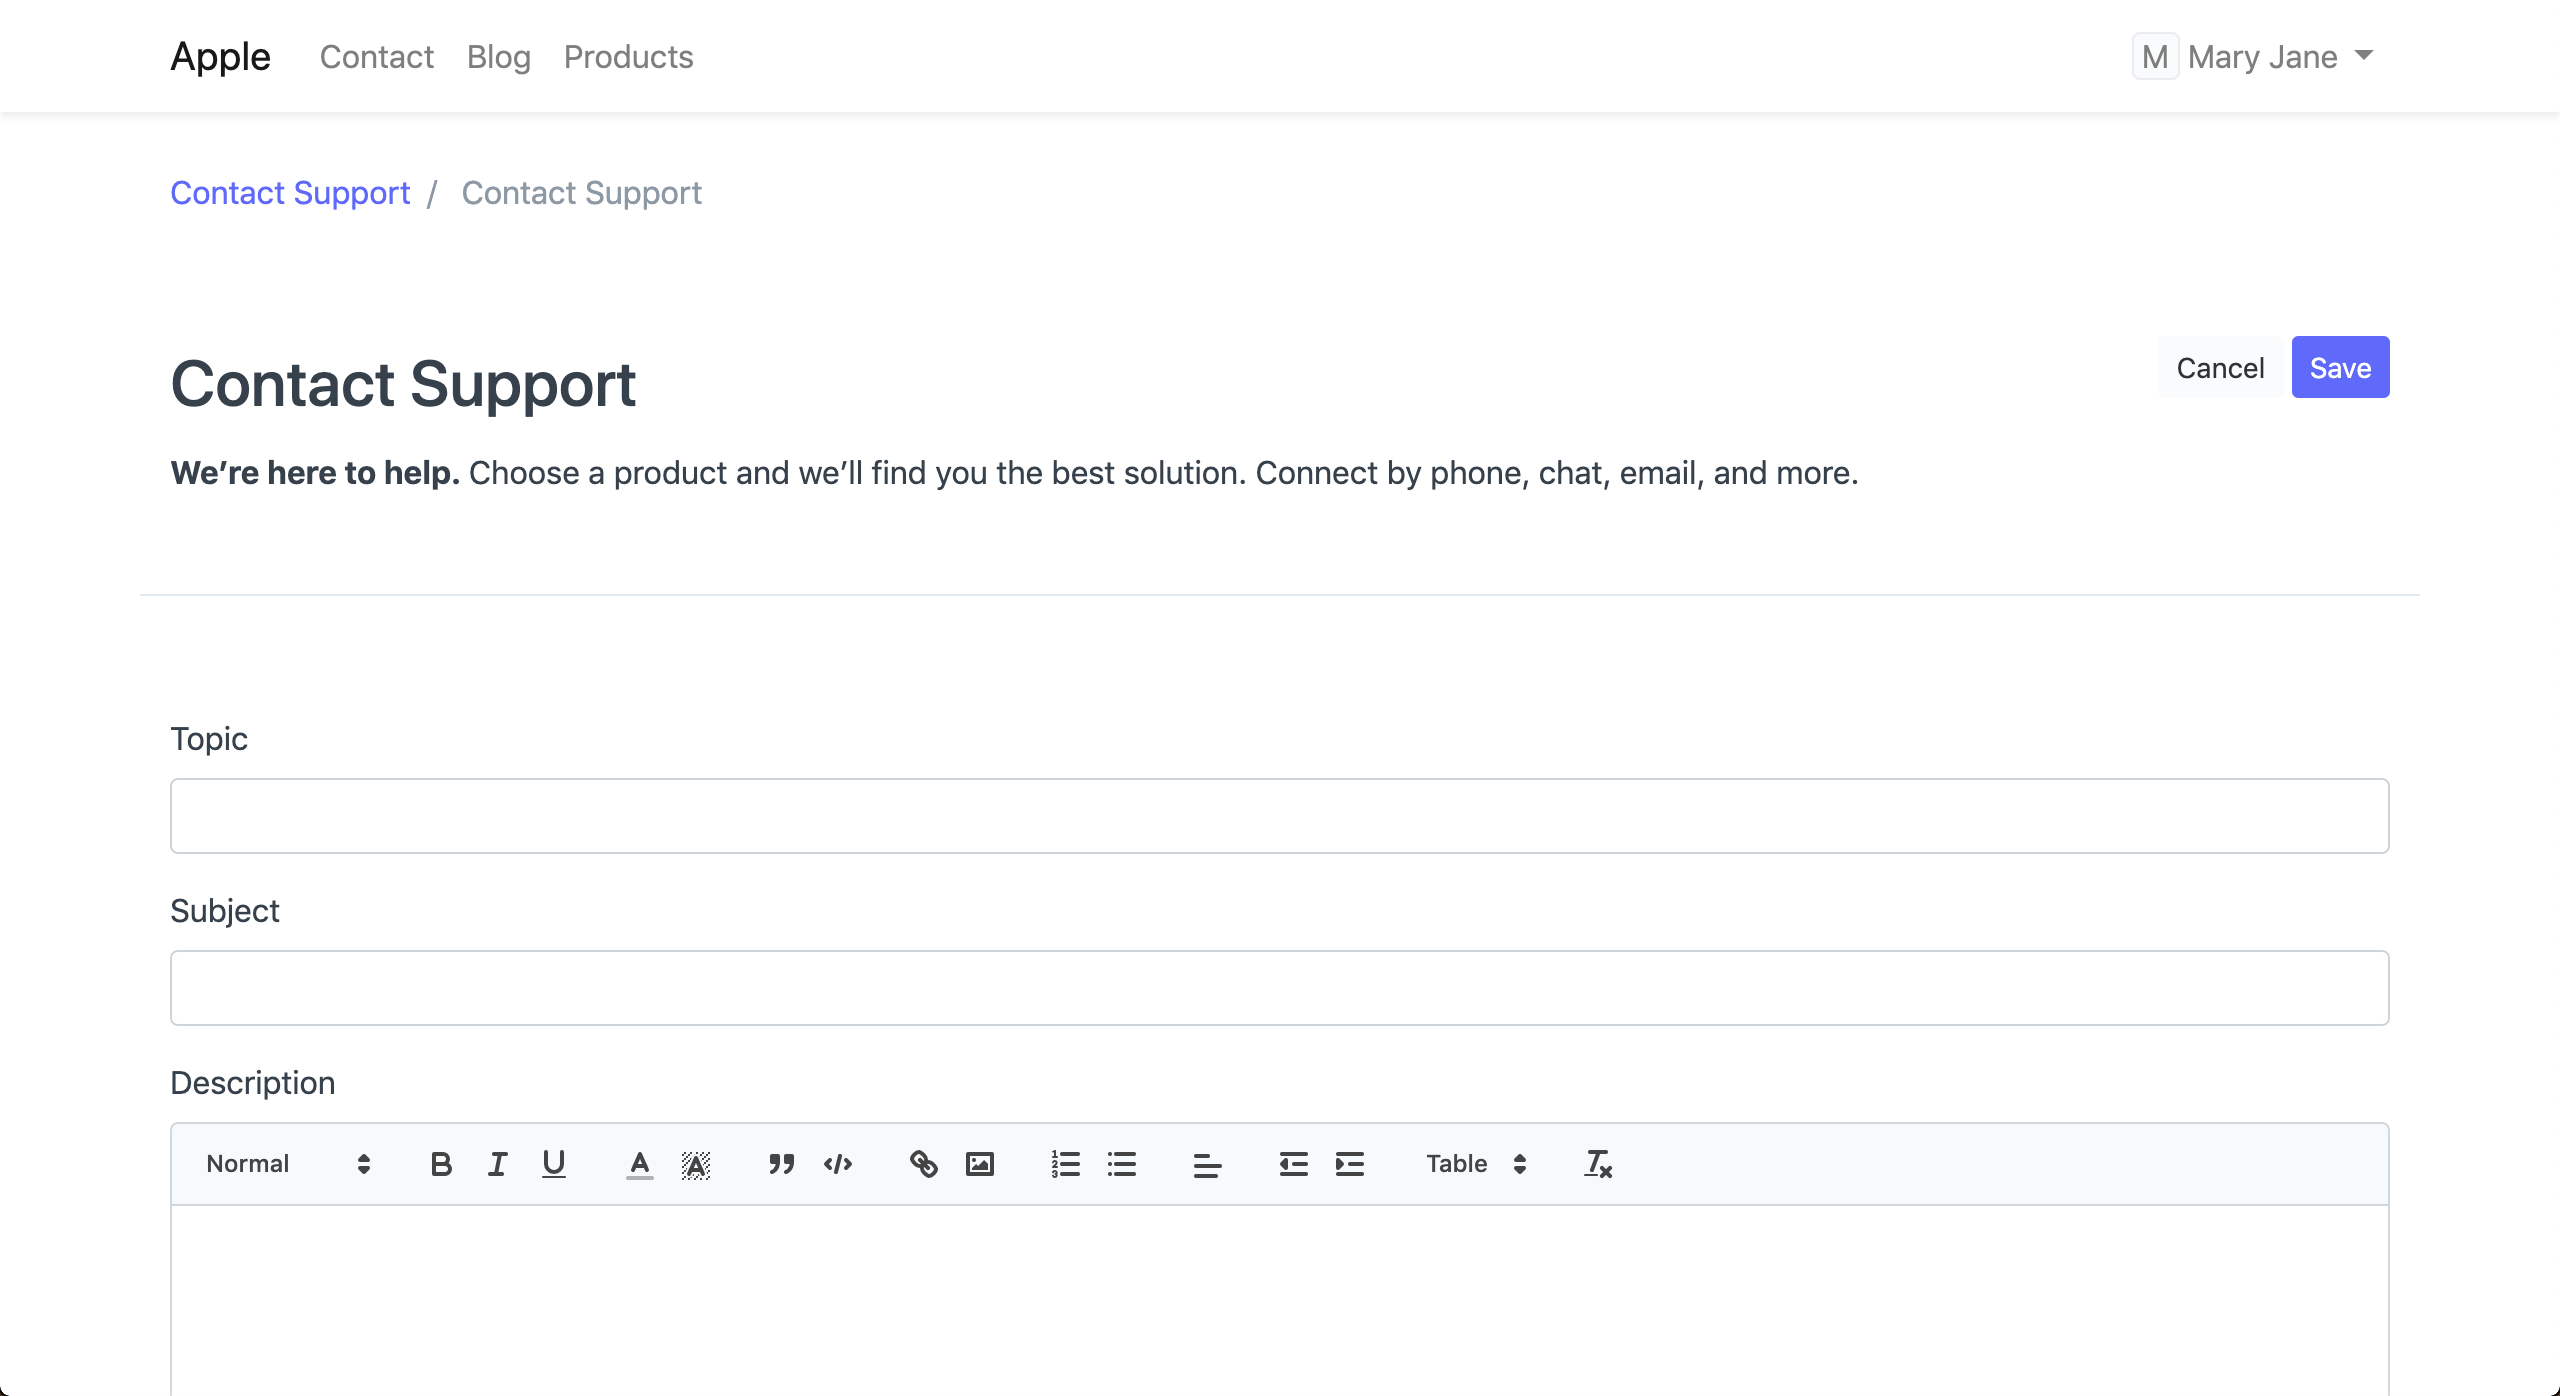
Click on See on Website in the sidebar to view your Web form.
Website Settings
Website related settings like landing page and website wide theme can be configured here.
To access Website Settings, go to:
Home > Website > Setup > Website Settings
1. Landing Page
Configure the default landing page of your website by setting the Home Page field to the route of that page. You can put any route here including standard routes like home, about, contact, login, all-products, and blog.
You can also set a Web Page as the landing page.
If you want to use the ERPNext Homepage, you must set it as home.

You can also set the Title Prefix here. It will be appended to the browser title on every page. You can put your company name here.
2. Website Theme
Create a personalized theme for your Website and set it here.
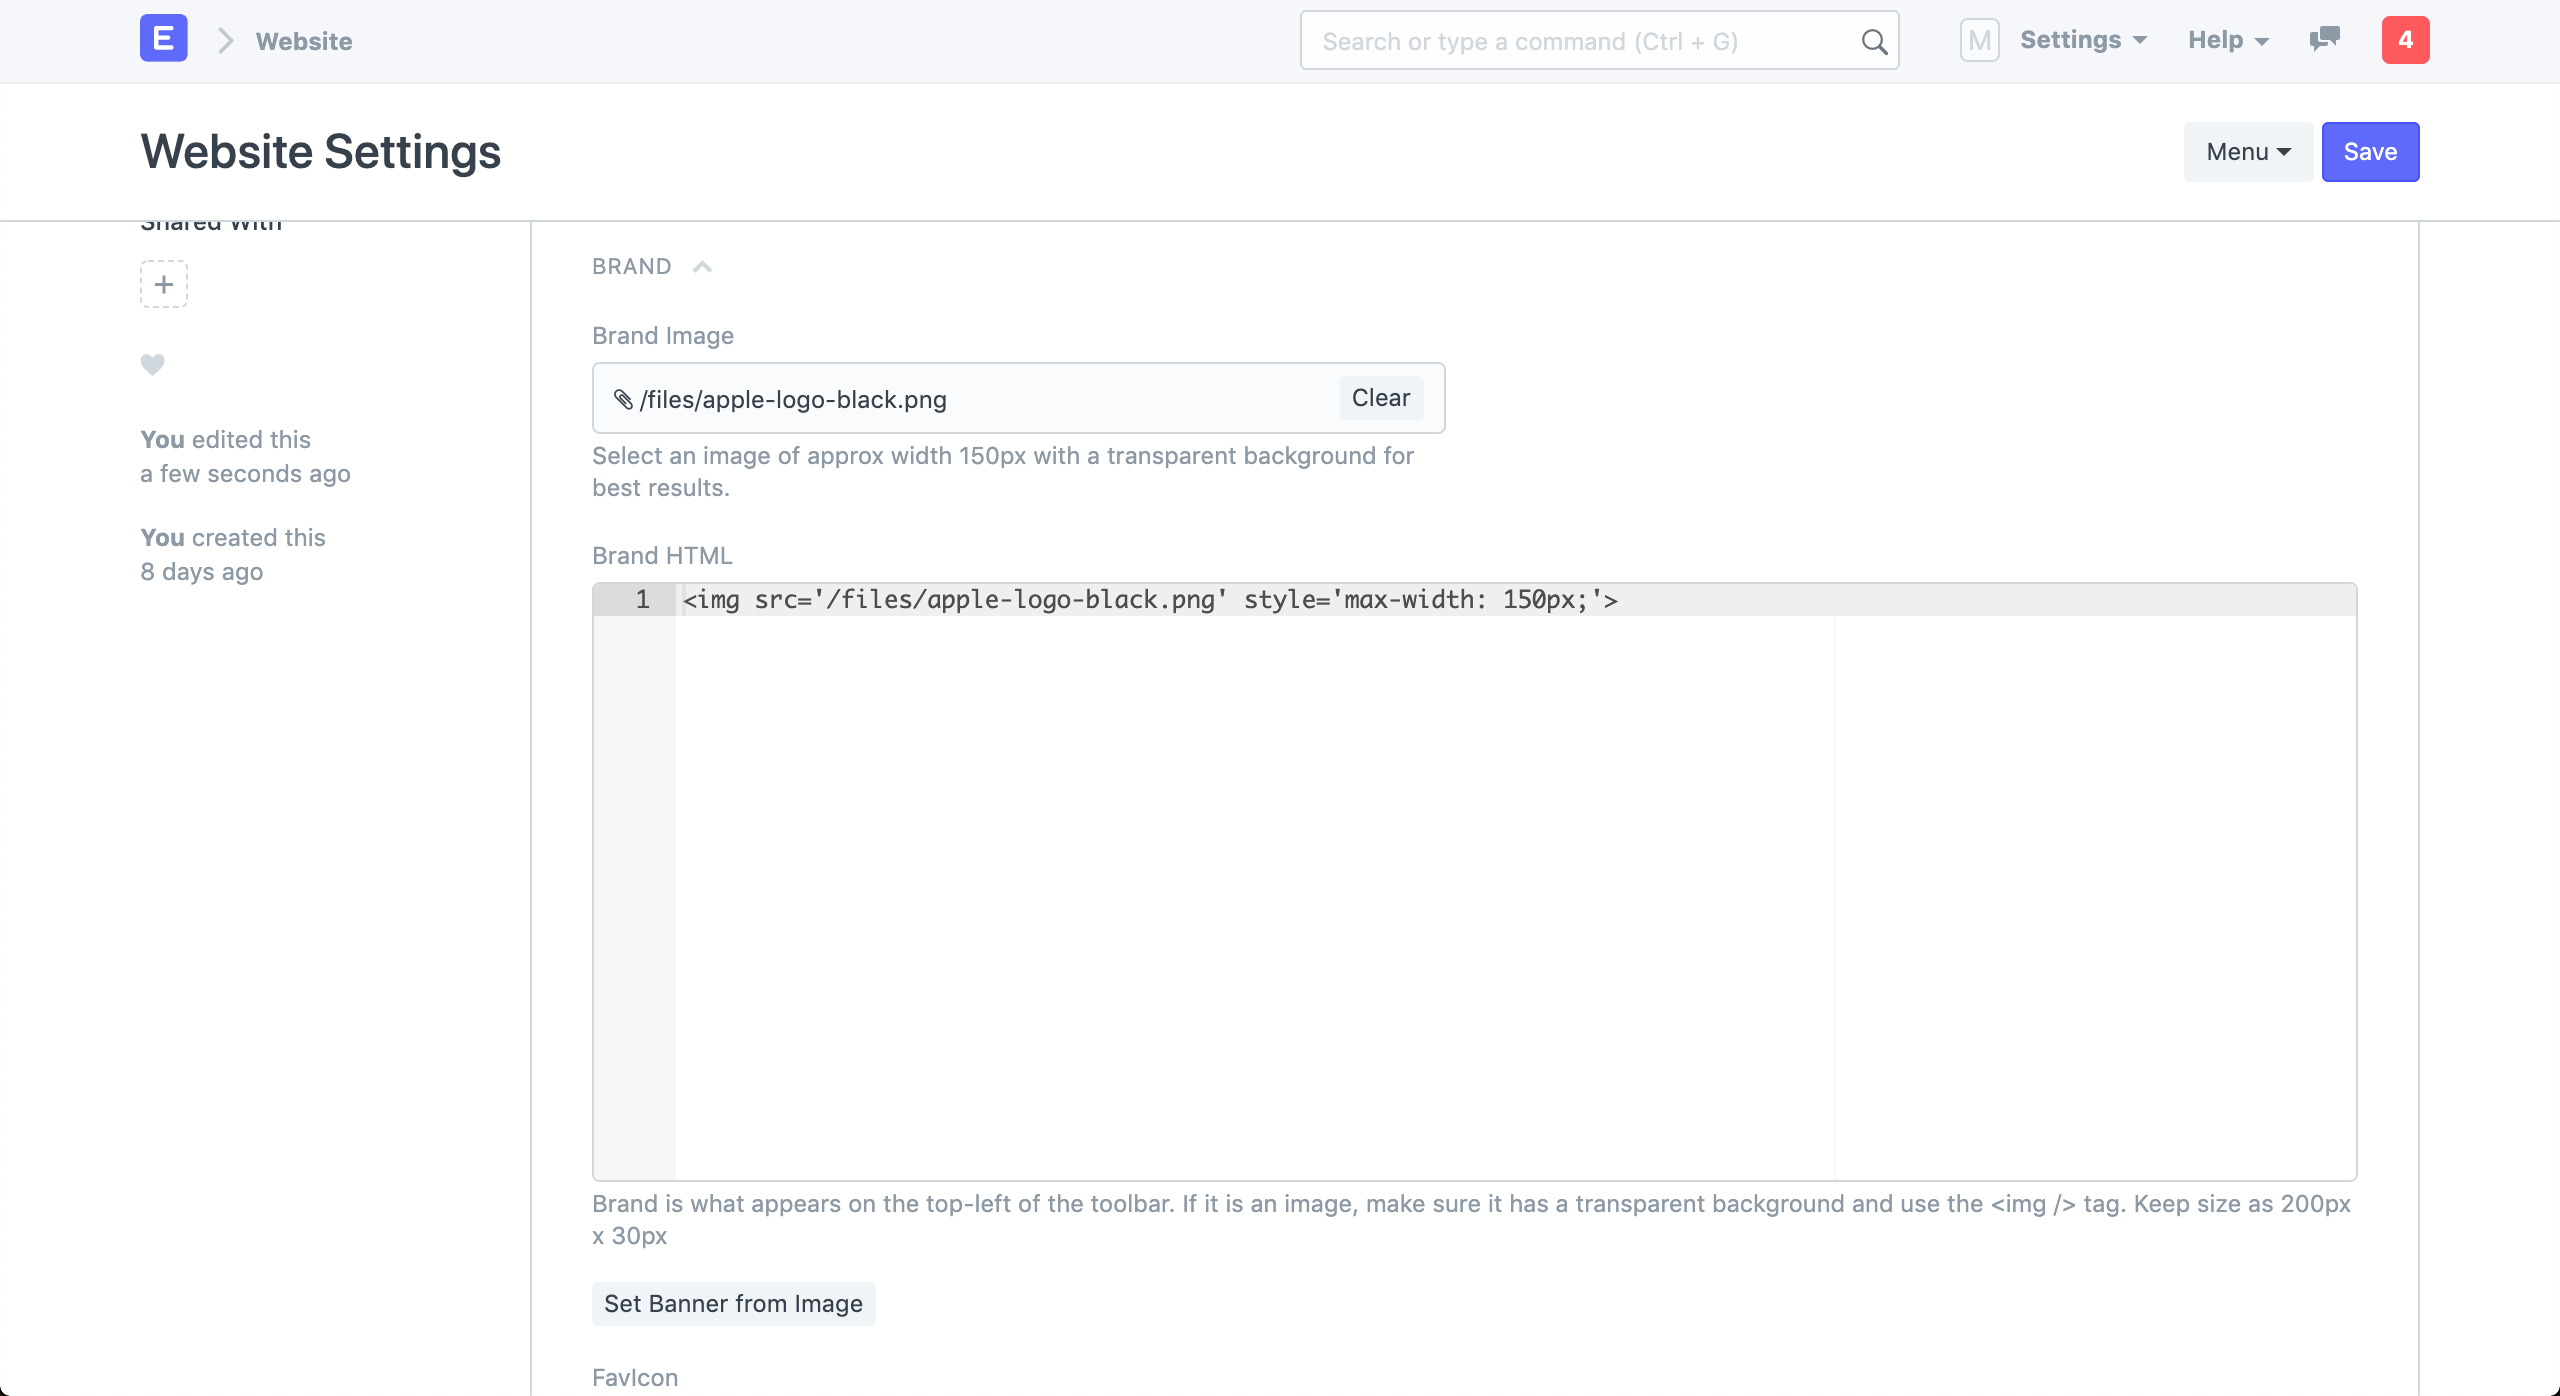
3.Brand
3.1 Brand Logo
You can set the brand logo for your website in this section. Upload the Brand Image first and then click on "Set Banner from Image" button. It will generate a Banner HTML with your uploaded logo.
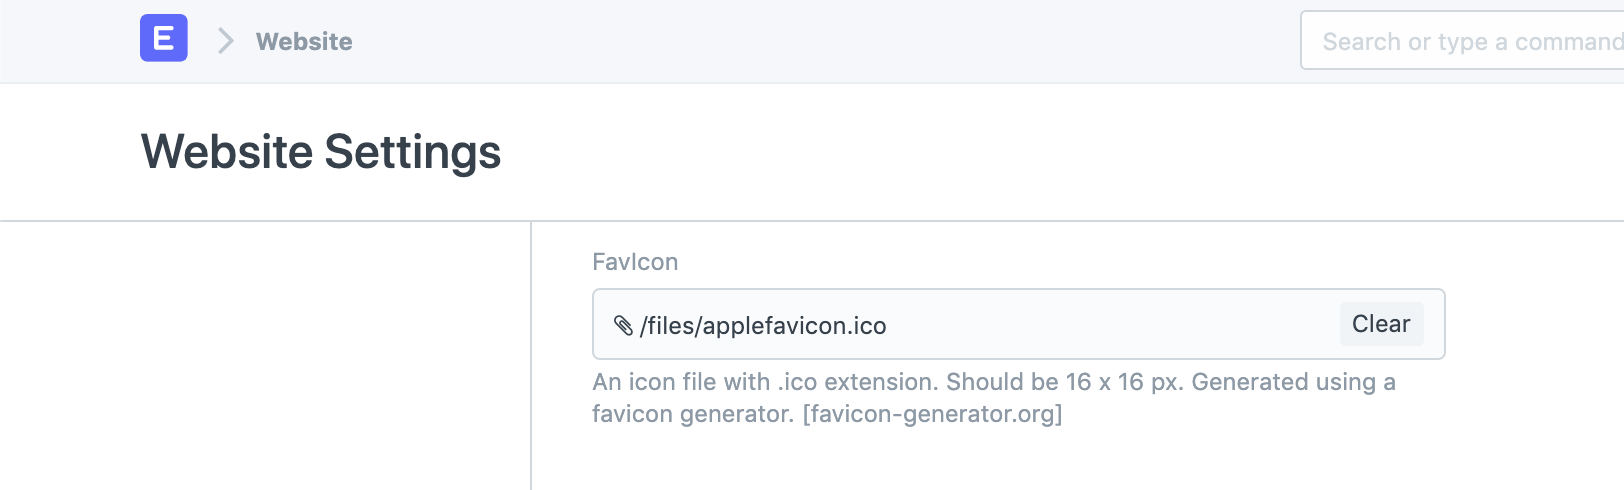
3.2 Favicon
You can also set the favicon of your website in this section. It appears on the left side of the browser tab.
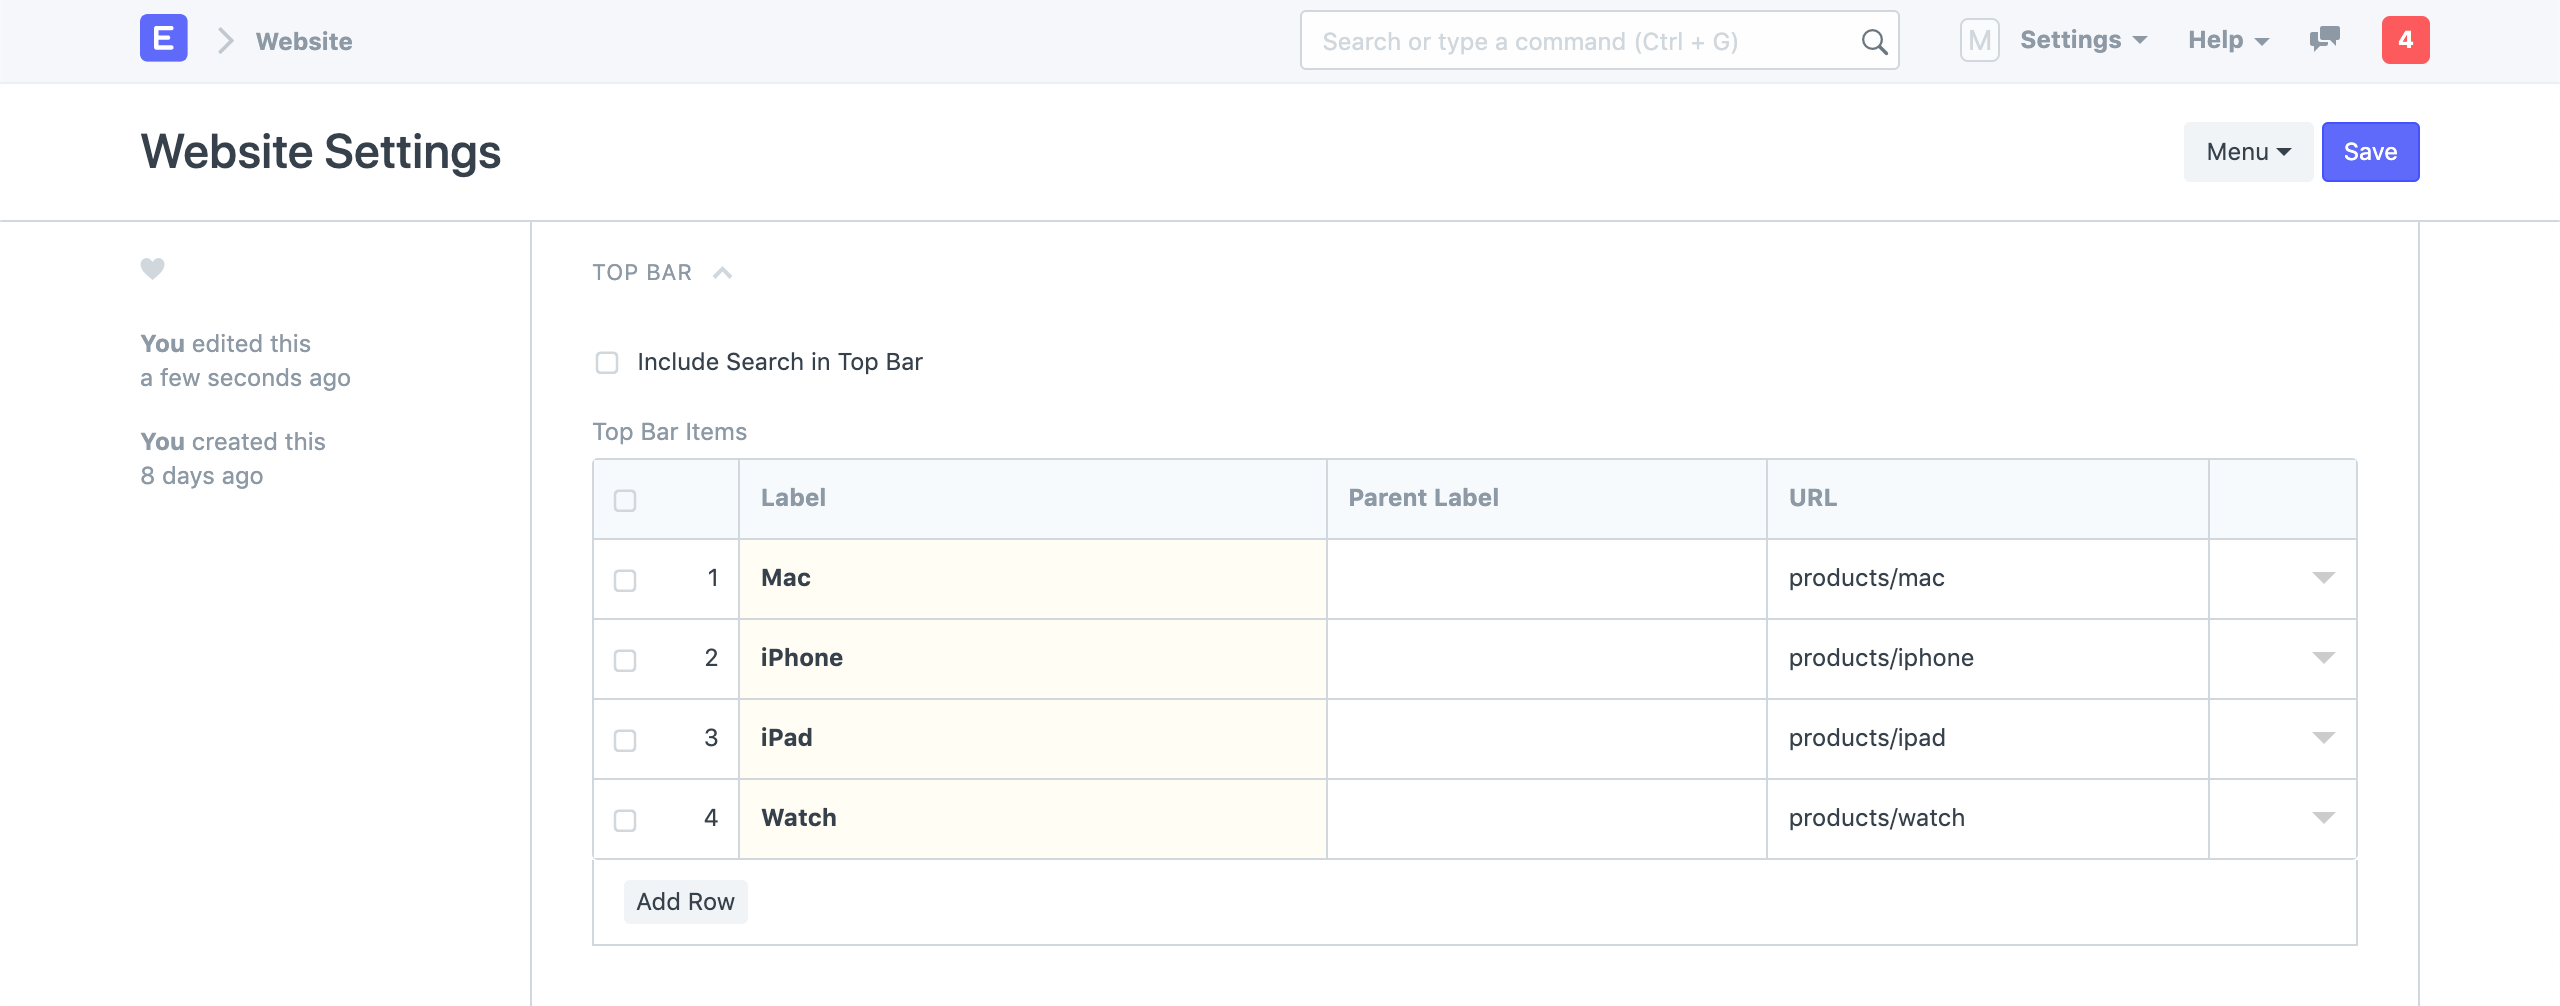
4. Top Bar
You can customize the menu items in the navbar of your website from the Top Bar section.
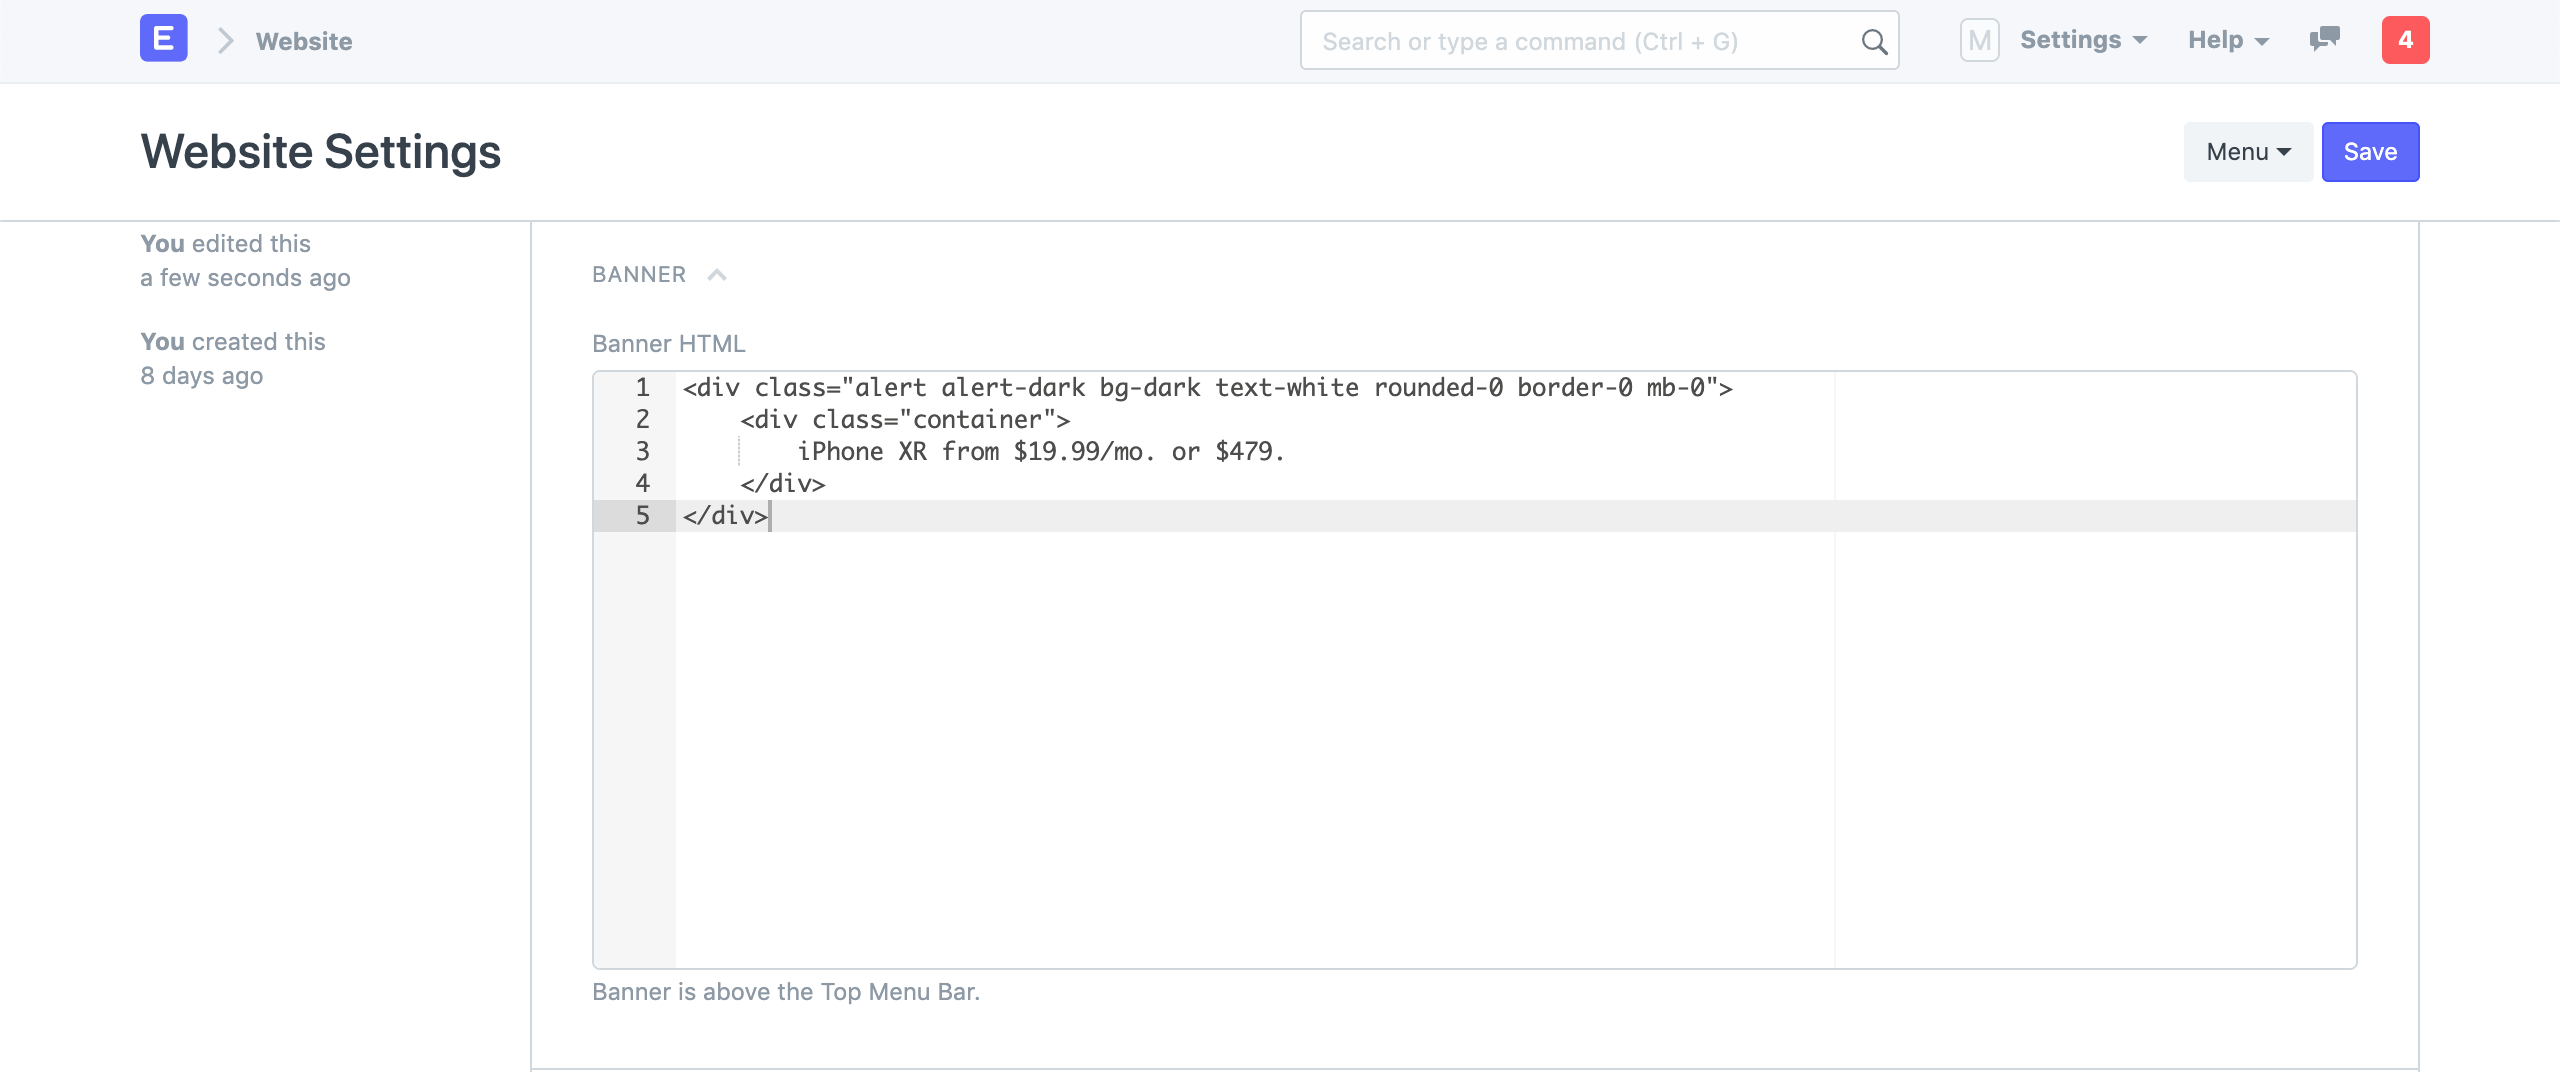
5. Banner
You can add a persistent banner to your website which will be shown above the navbar on all web pages. You can write any valid Bootstrap 4 markup here.
6. Footer
You can add address information and categorized links to your footer in the Footer section.

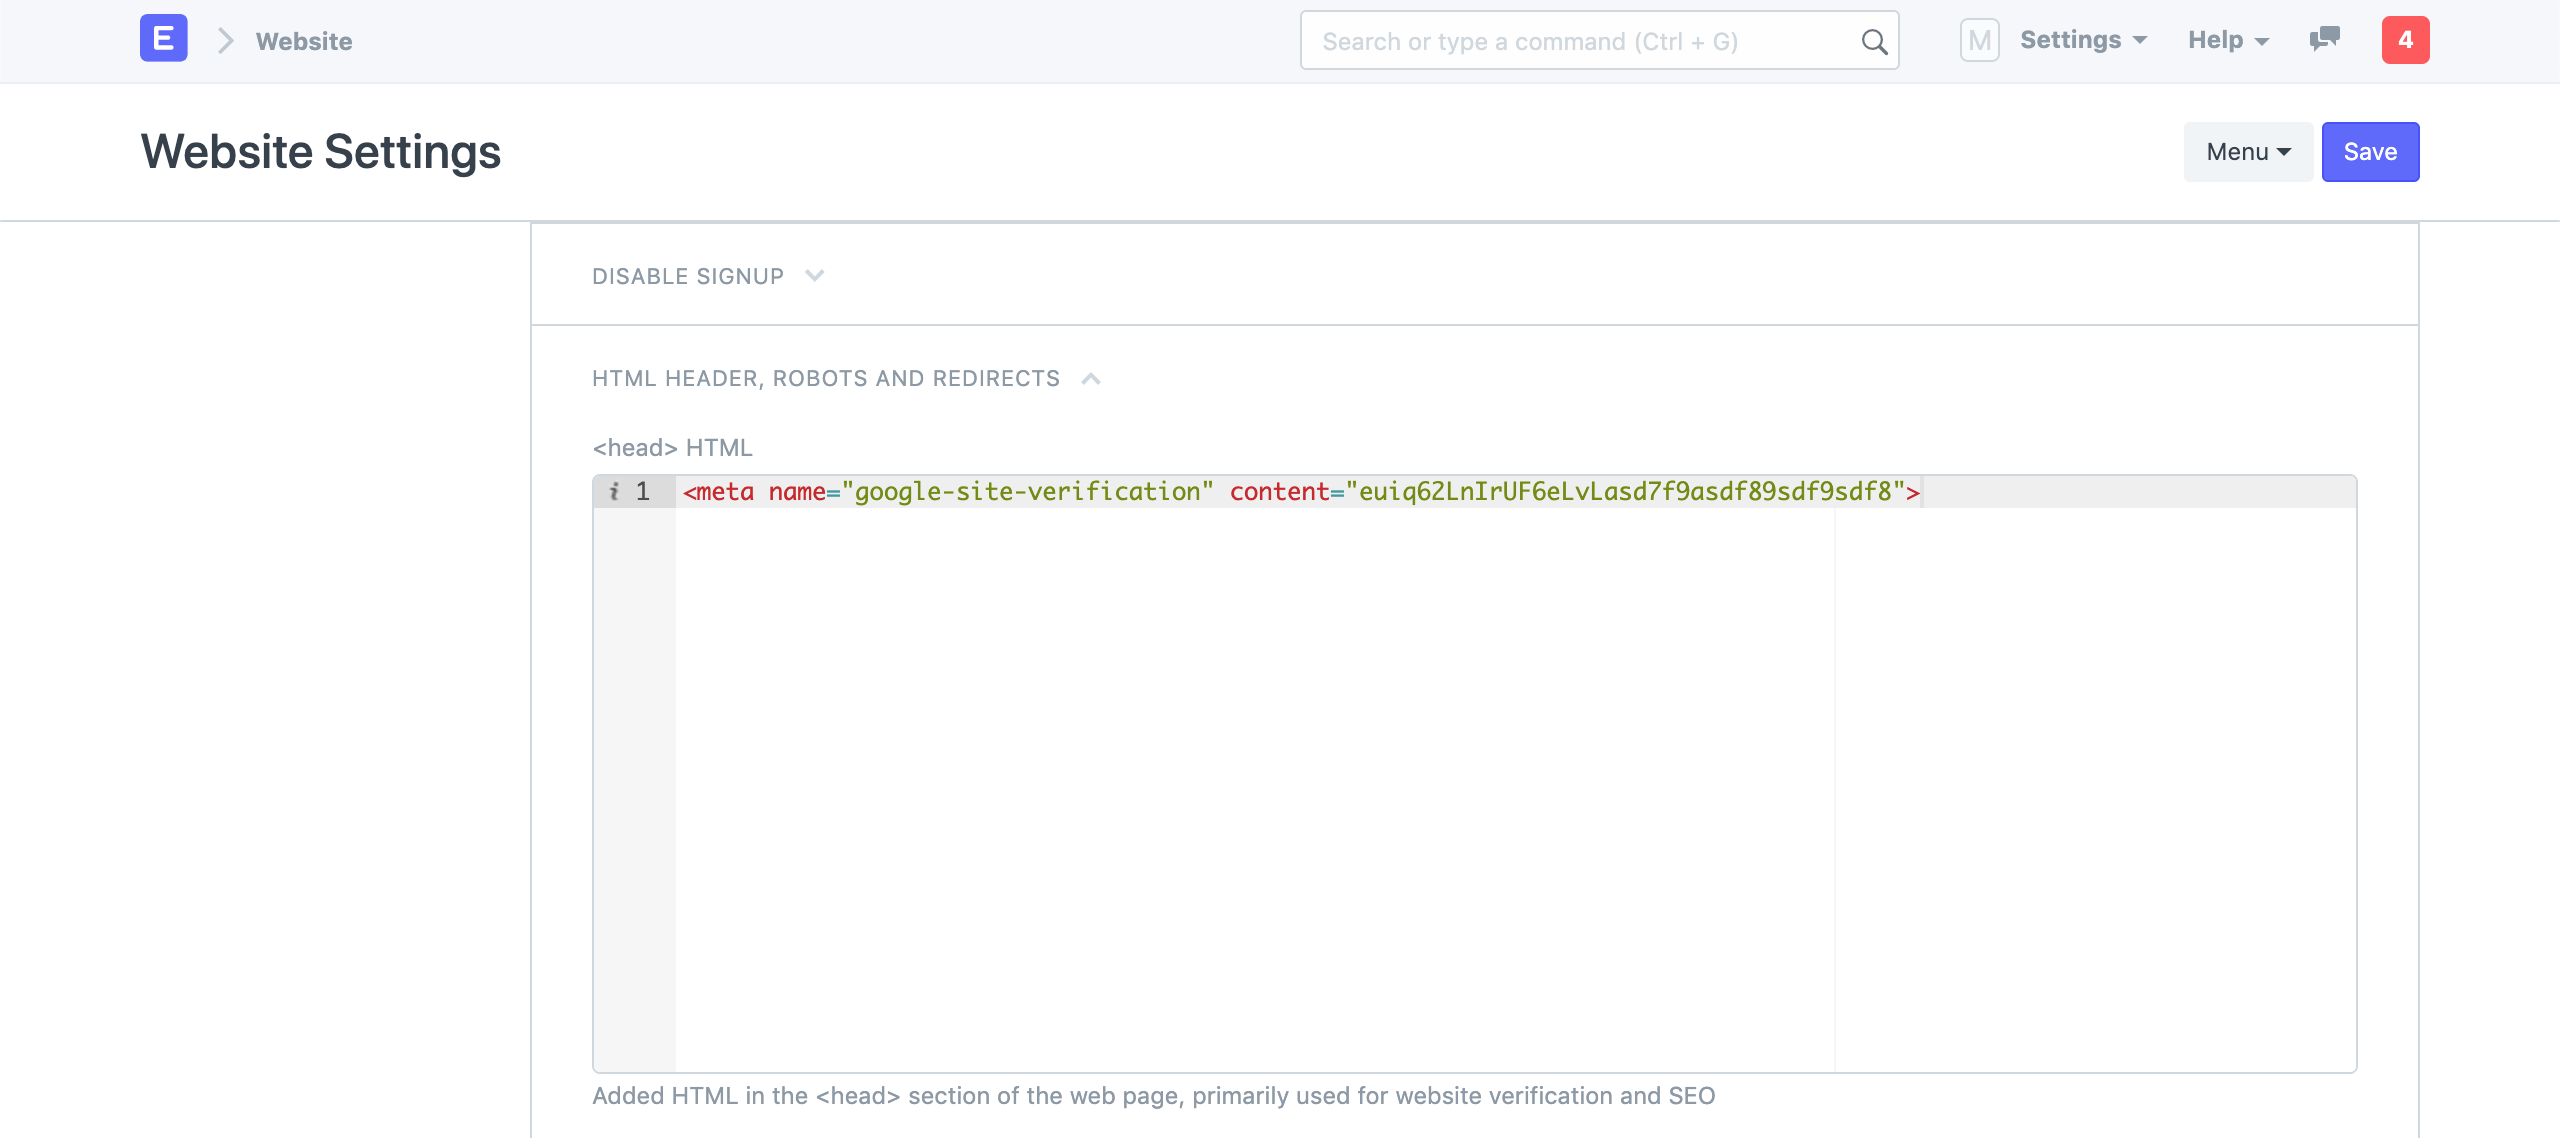
8. HTML Header
You can use this section to set meta tags across all of your web pages. A common use case is to add Google site verification tags.
Web Page
Static Content like your Home Page, About Us, Contact Us, Terms pages can be created using the Web Page.
To access Web Page go to:
Home > Website > Web Site > Web Page
1. How to create a Web Page
Go to the Web Page list and click on New.
Enter a Title and add content in Main Section. The route will auto generated but you can change it.
Click on Save.
The web page will be published only when Published is ticked.

1.1 Tips on making a good Web Page
Title
The first thing to set is the title of your page. The title has the maximum weight for search engines so choose a title that reflects the keywords that you are targeting for your audience. The route (URL) will be auto-generated from the title but you can change it.
Content
Images
For Rich Text Content, you can directly embed images using the editor.
2. Features
2.1 Slideshow
You can also add a Slideshow to your Web Page.
2.2 Scheduled Publishing
You can schedule your Web Pages for publishing if you set Start Date and End Date for your Web Page. They will be set as published within the date ranges and will be unpublished outside the range automatically.
Unpublished pages will throw an Error 404 when they are visited.
2.3 Javascript and CSS
You can add a JS script to your Web Page in the Script section. Make sure to write your script inside the frappe.ready callback.
 frappe.ready(() => {
     // your script here
 });
You can add CSS styling to your Web Page in the Style section.
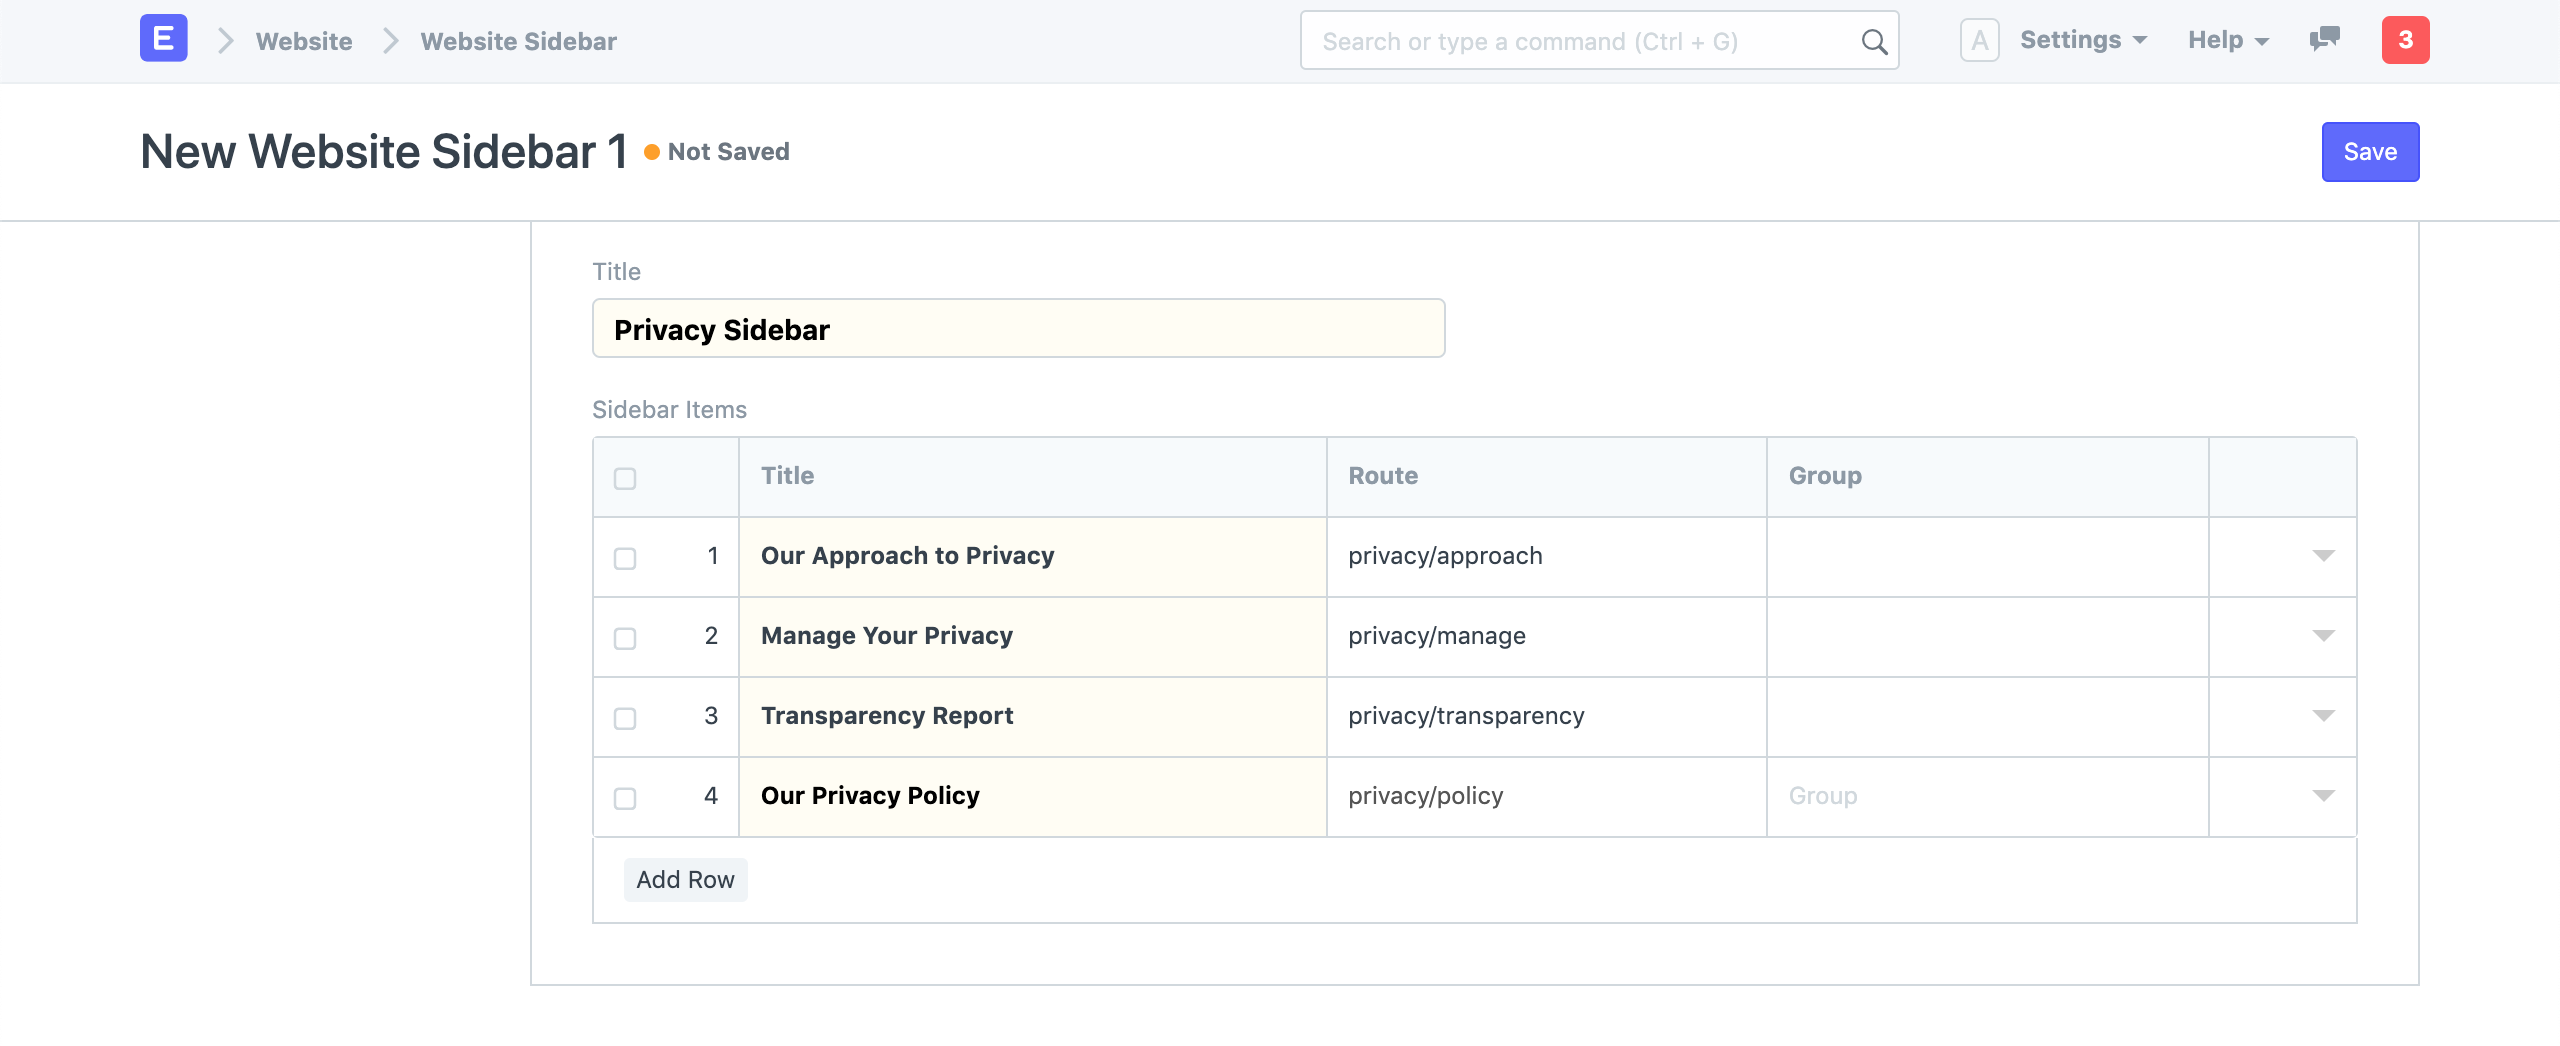
2.4 Sidebar
You can add a Website Sidebar with custom links on your Web Page. In the Sidebar and Comments section enable Show Sidebar. Select an existing Website Sidebar or create a new one.
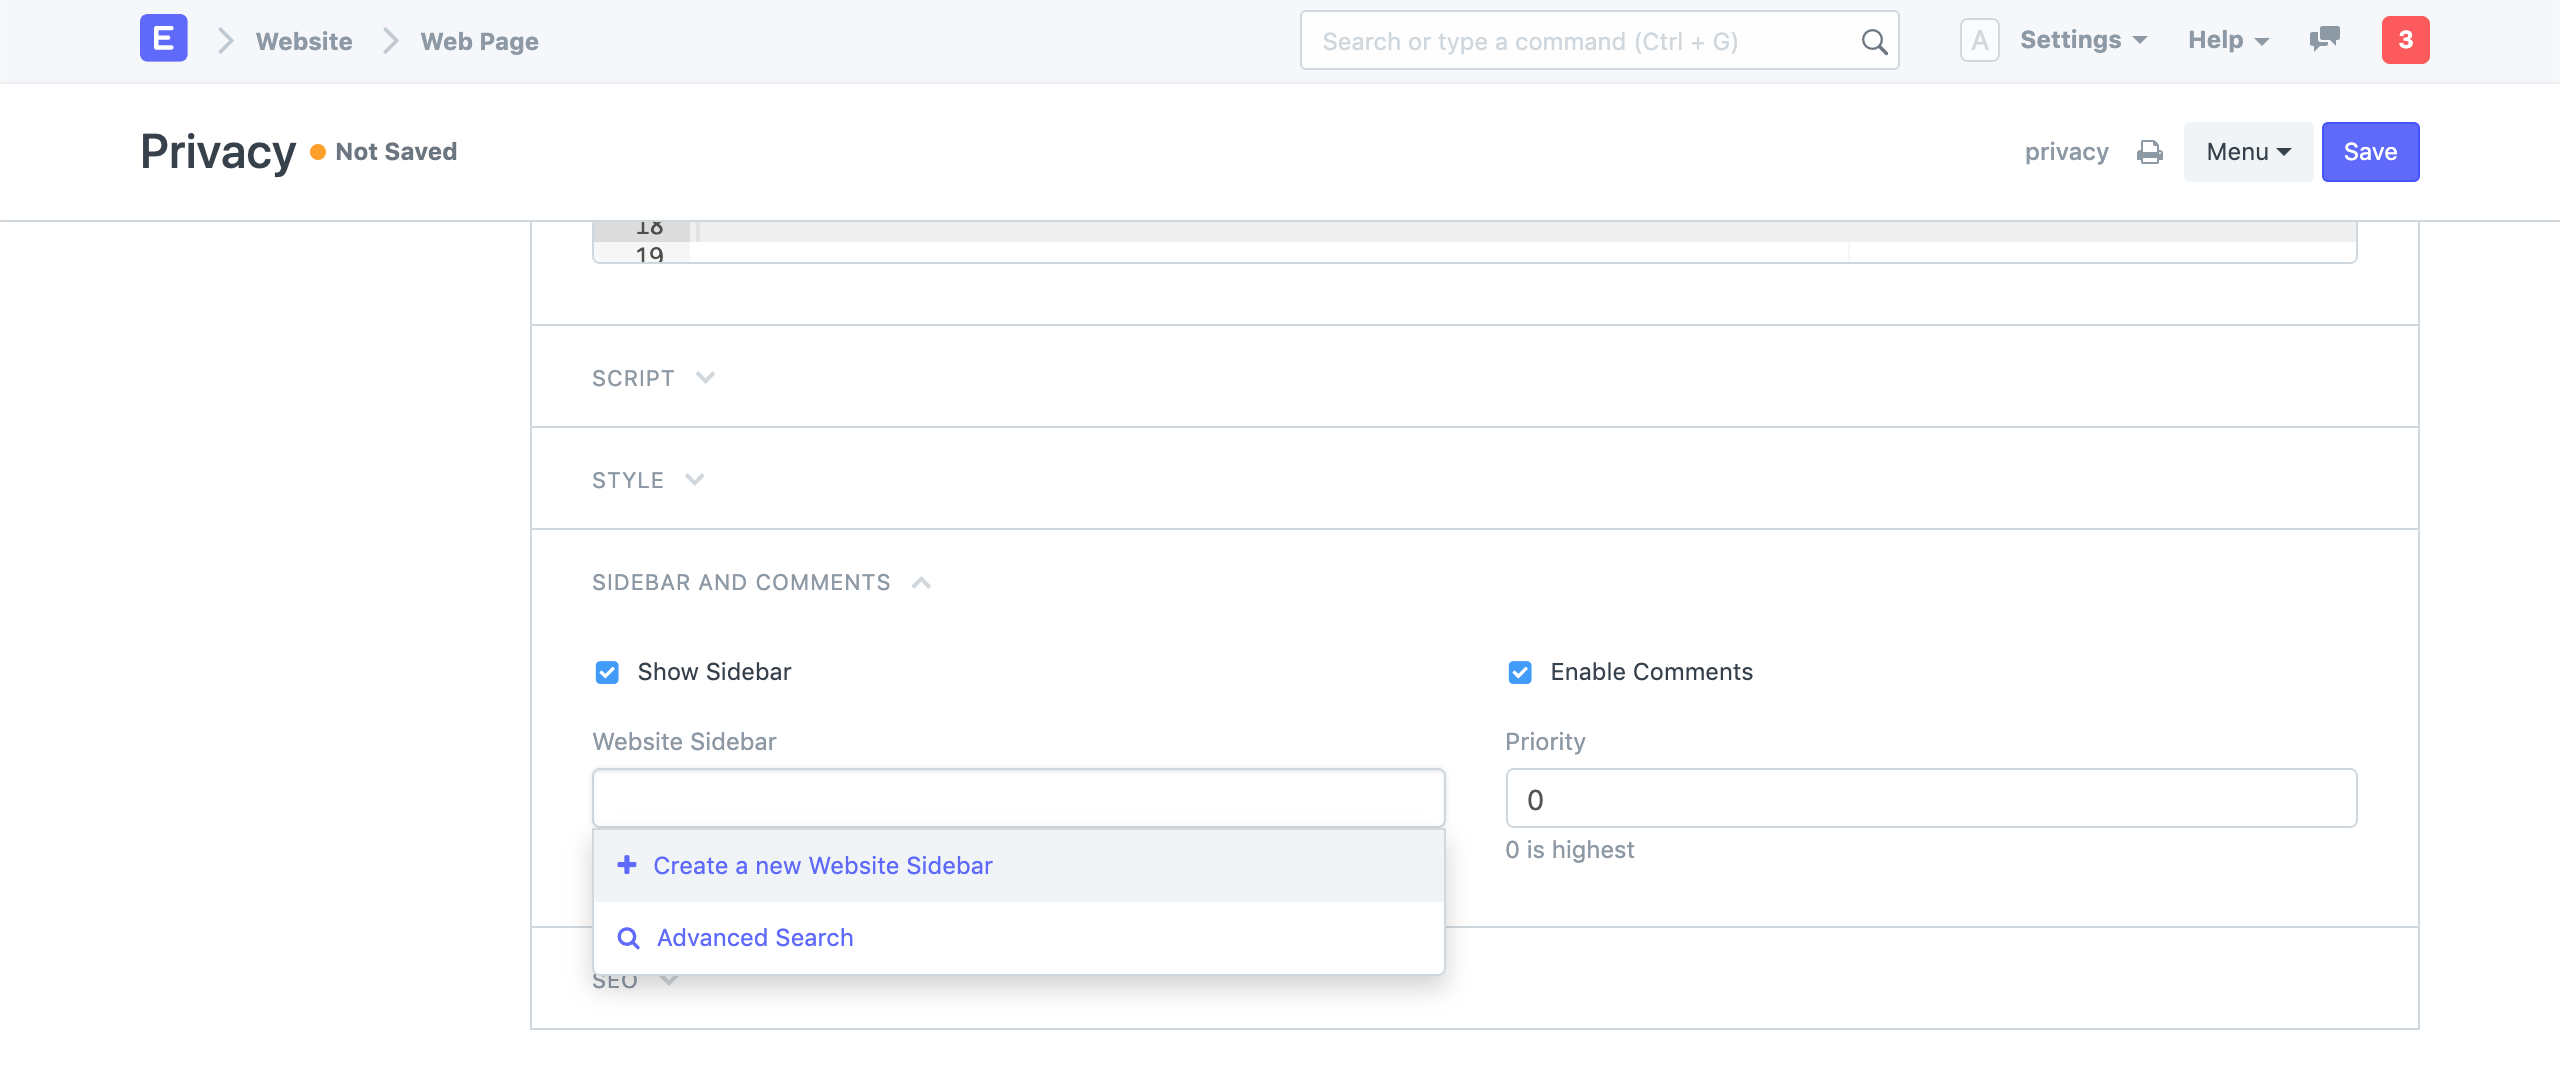
Add links and their route in the Sidebar Items table.
2.5 Comments
You can enable comments on your Web Page where people can leave a comment with their Name and Email. Enable comments from the Sidebar and Comments section
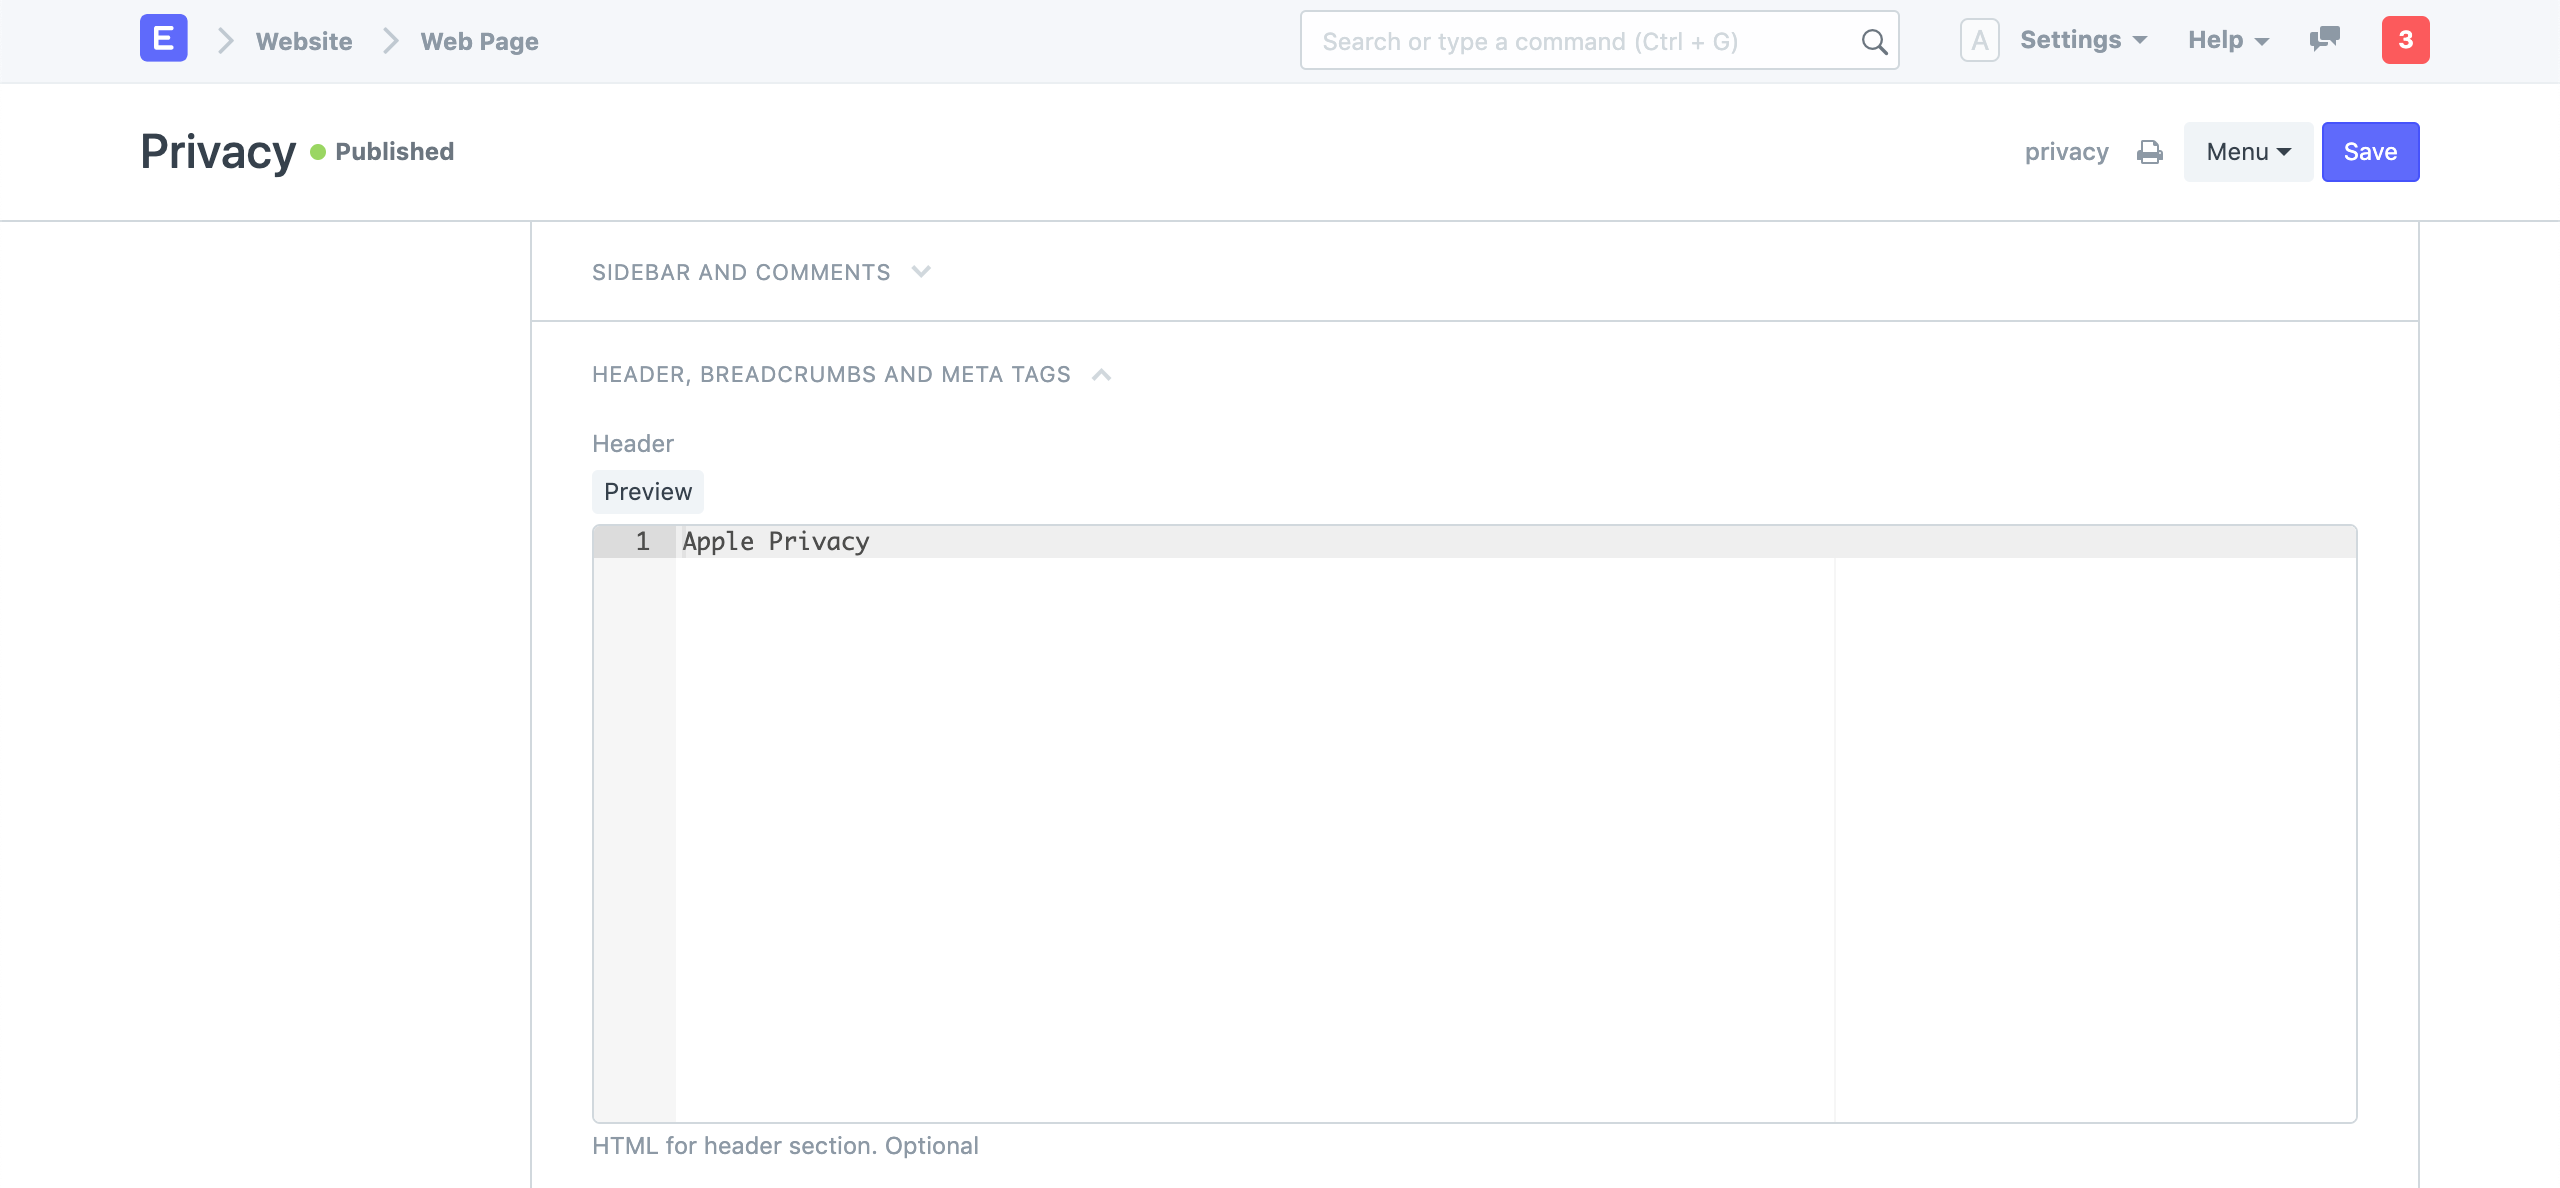
2.6 Header
You can add a custom HTML for the header section of the page. This will override the title of the Web Page.
2.7 Breadcrumbs
You can add a list of breadcrumbs on your Web Page. These will be shown on top before the header.